Accessing the Editor
- Open any Course you've created
- Click More (three dots menu)
- Select Edit Course.
Or go directly to your Library, find the Course, and select Edit from the menu.
Course details
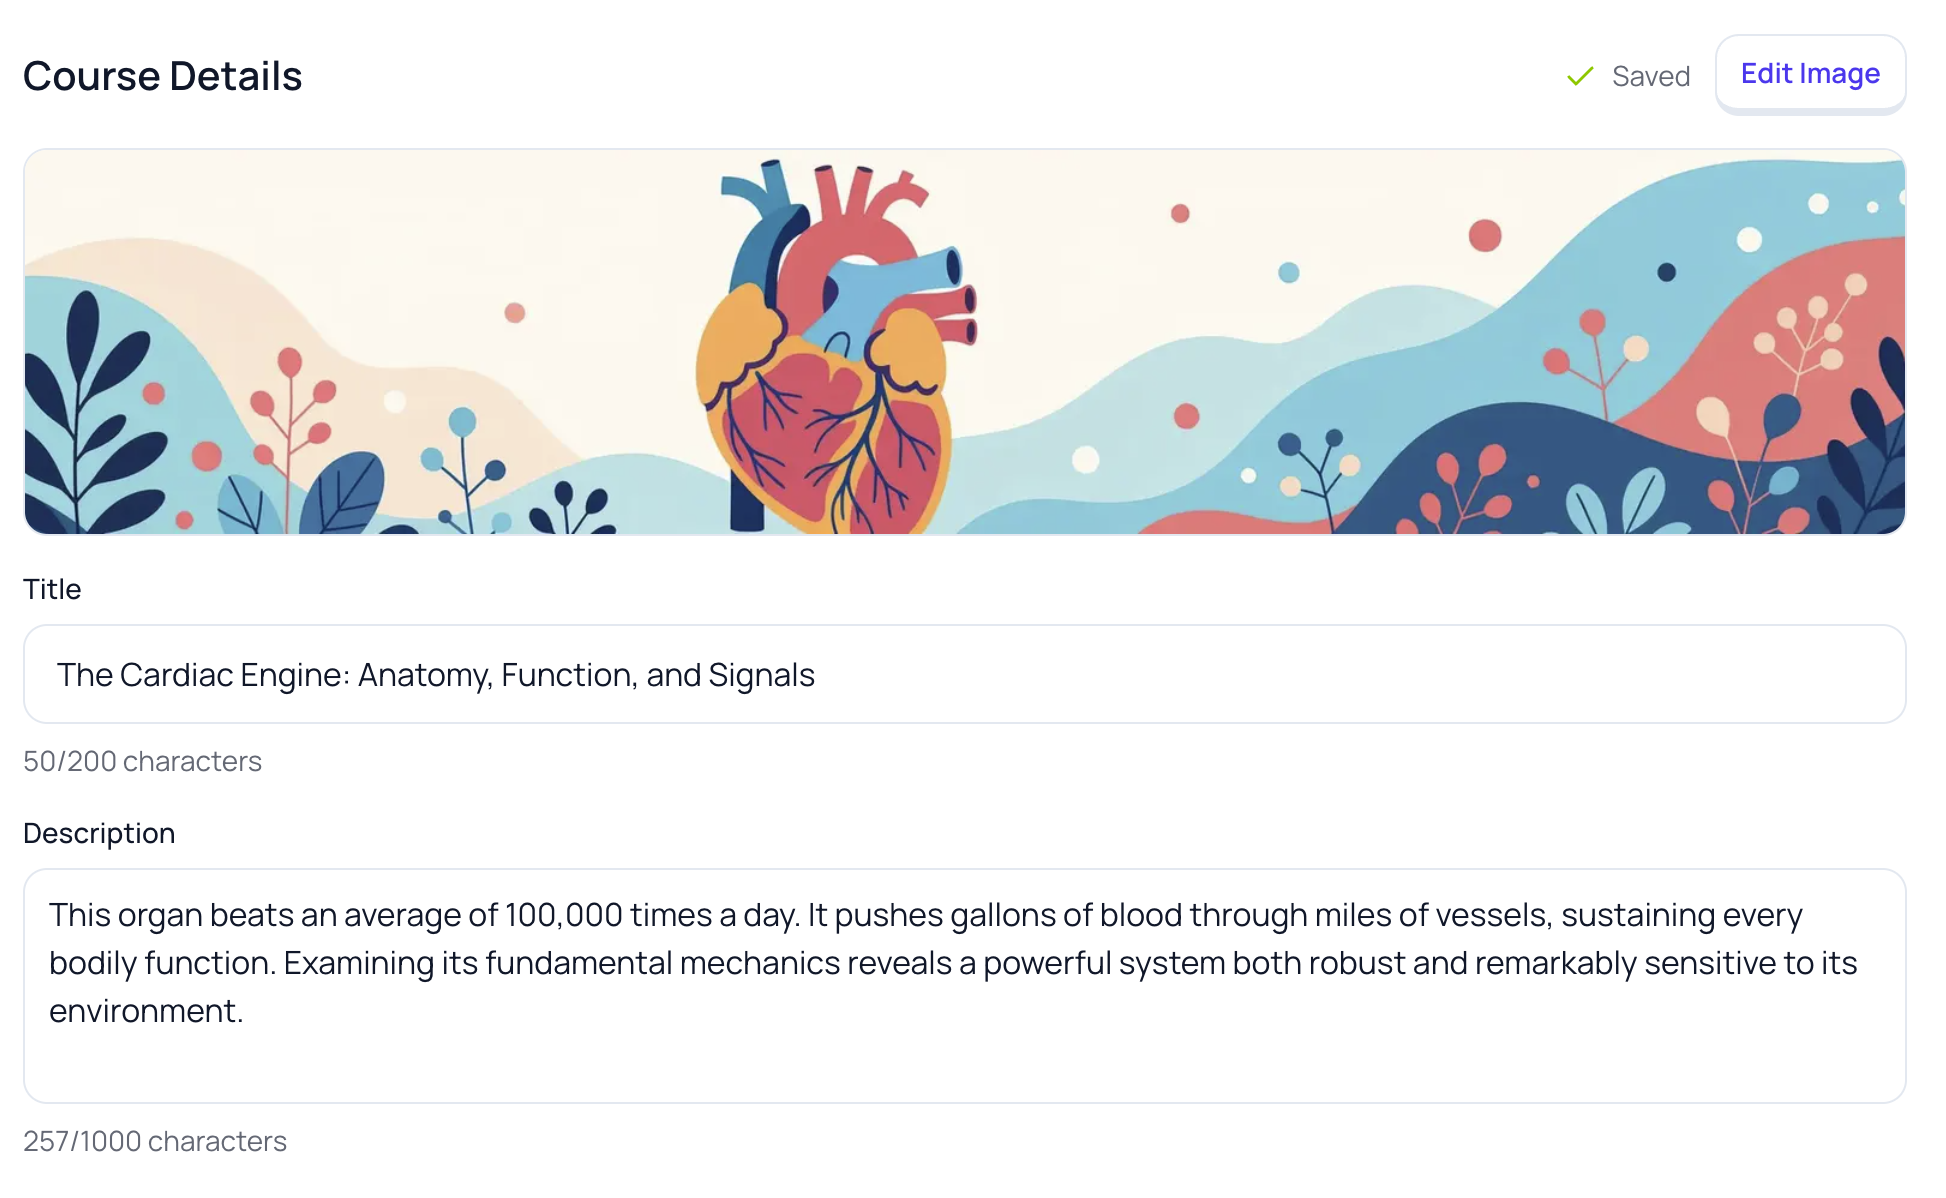
At the top of the editor, you can modify your Course's basic information:
Title— The name of your Course (shows in Library and when sharing) Description— A short summary of what the Course covers Cover image— Click to upload or change the Course thumbnail
Note: Changes autosave as you type – look for the "Saved" indicator.
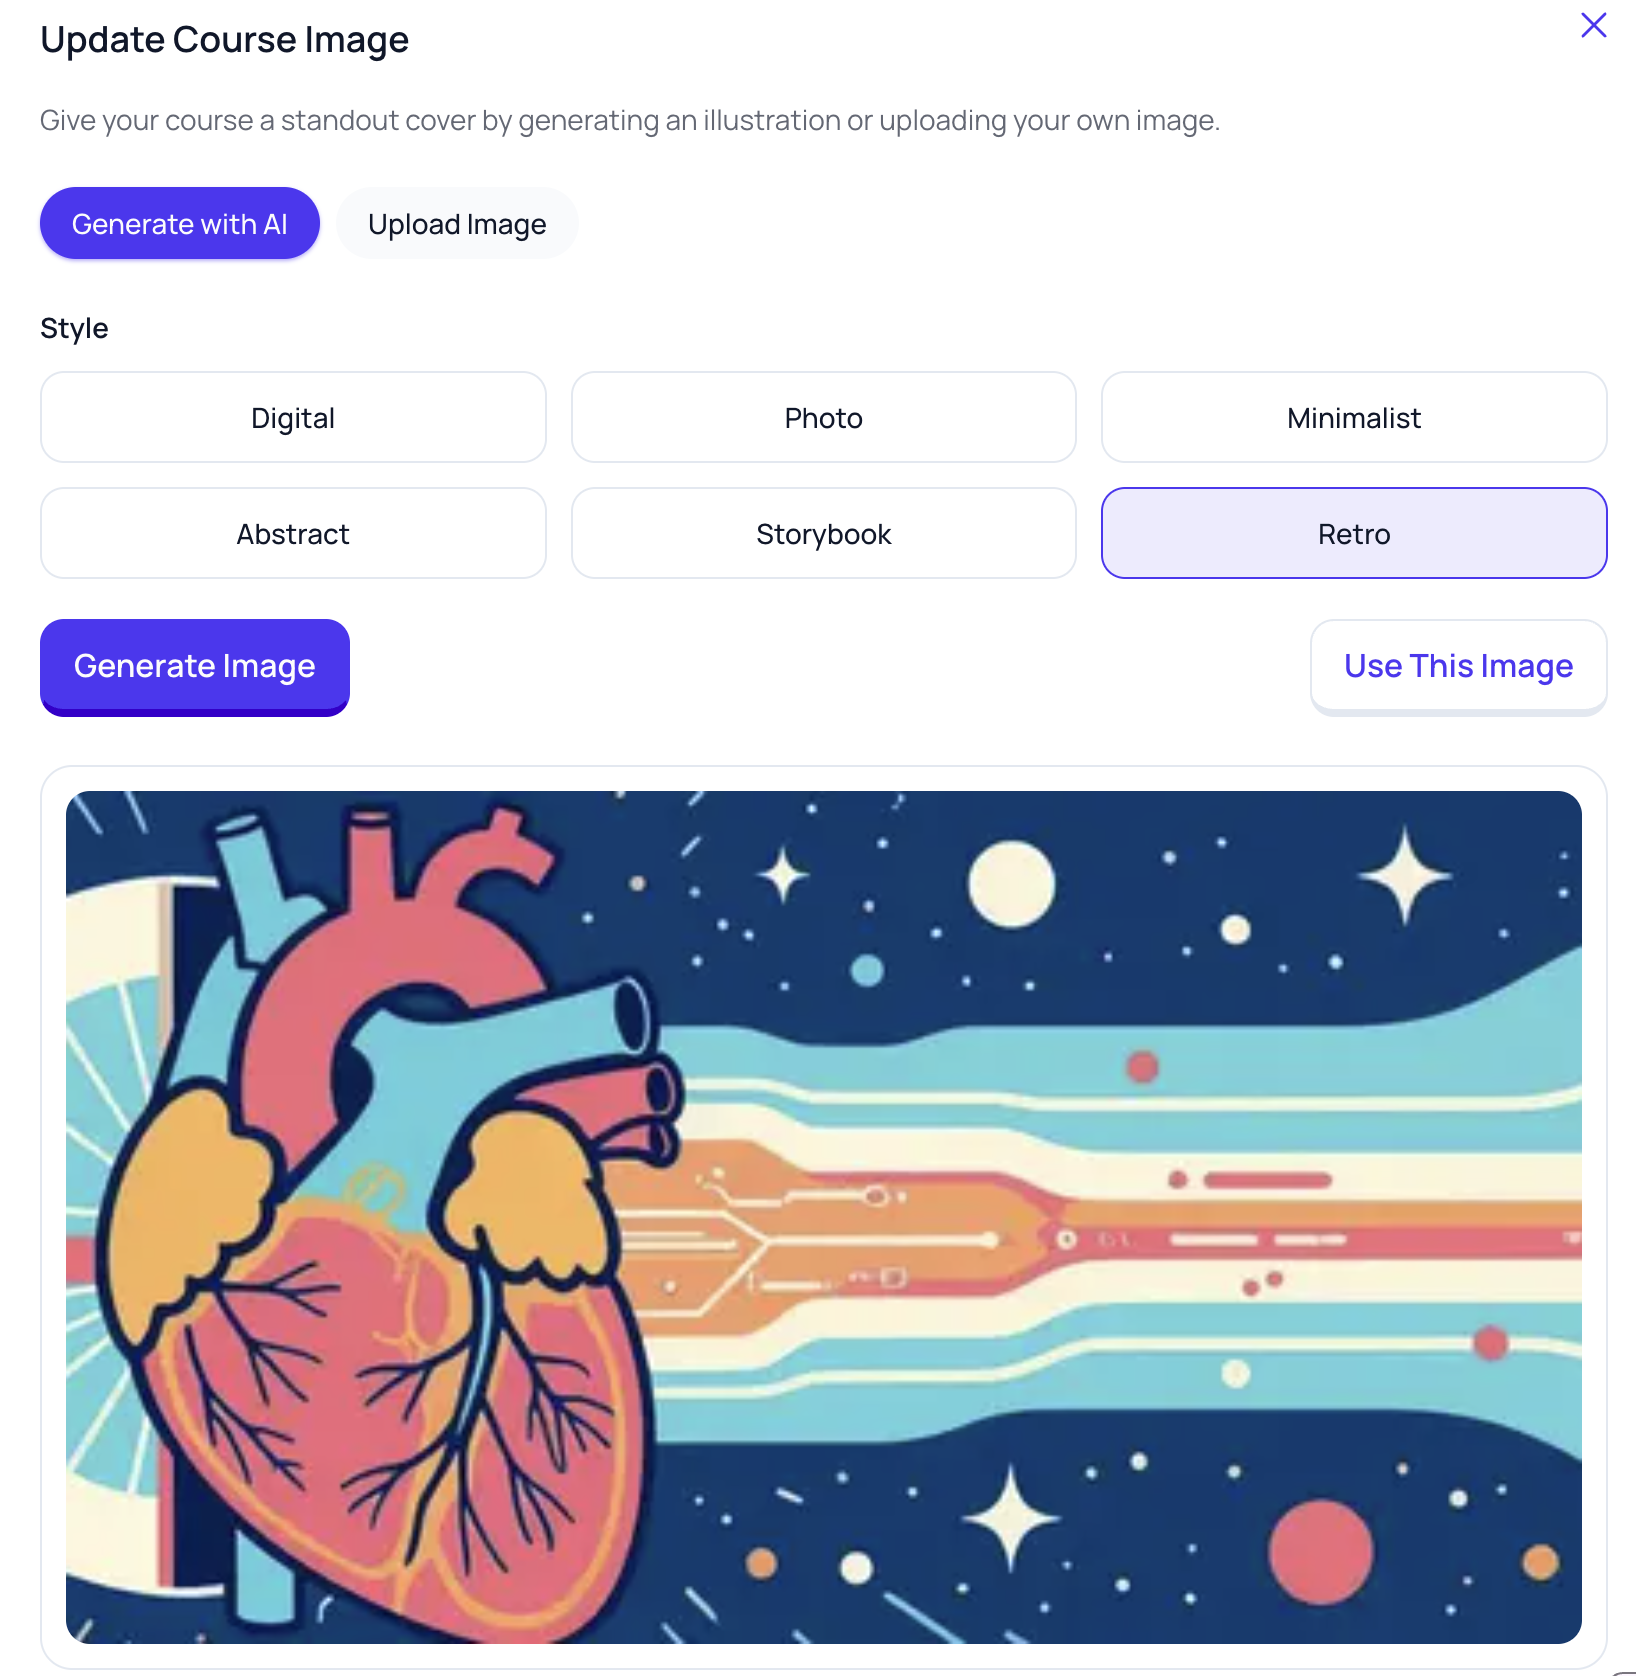
You can either generate a new cover image with AI or upload your own.
Option 1: Generate with AI
Select Generate with AI.
Under Style, choose a look (Digital, Photo, Minimalist, Abstract, Storybook, or Retro).
Select Generate Image.
Your image will appear in the preview area.
If you’re happy with it, select Use This Image to apply it to your Course cover.
- Want a different look? Pick a new Style and select Generate Image again.
Option 2: Upload an image
- Select Upload Image.
- Choose an image from your device.
- Check the preview.
- Select Use This Image to set it as your Course cover.
Modules
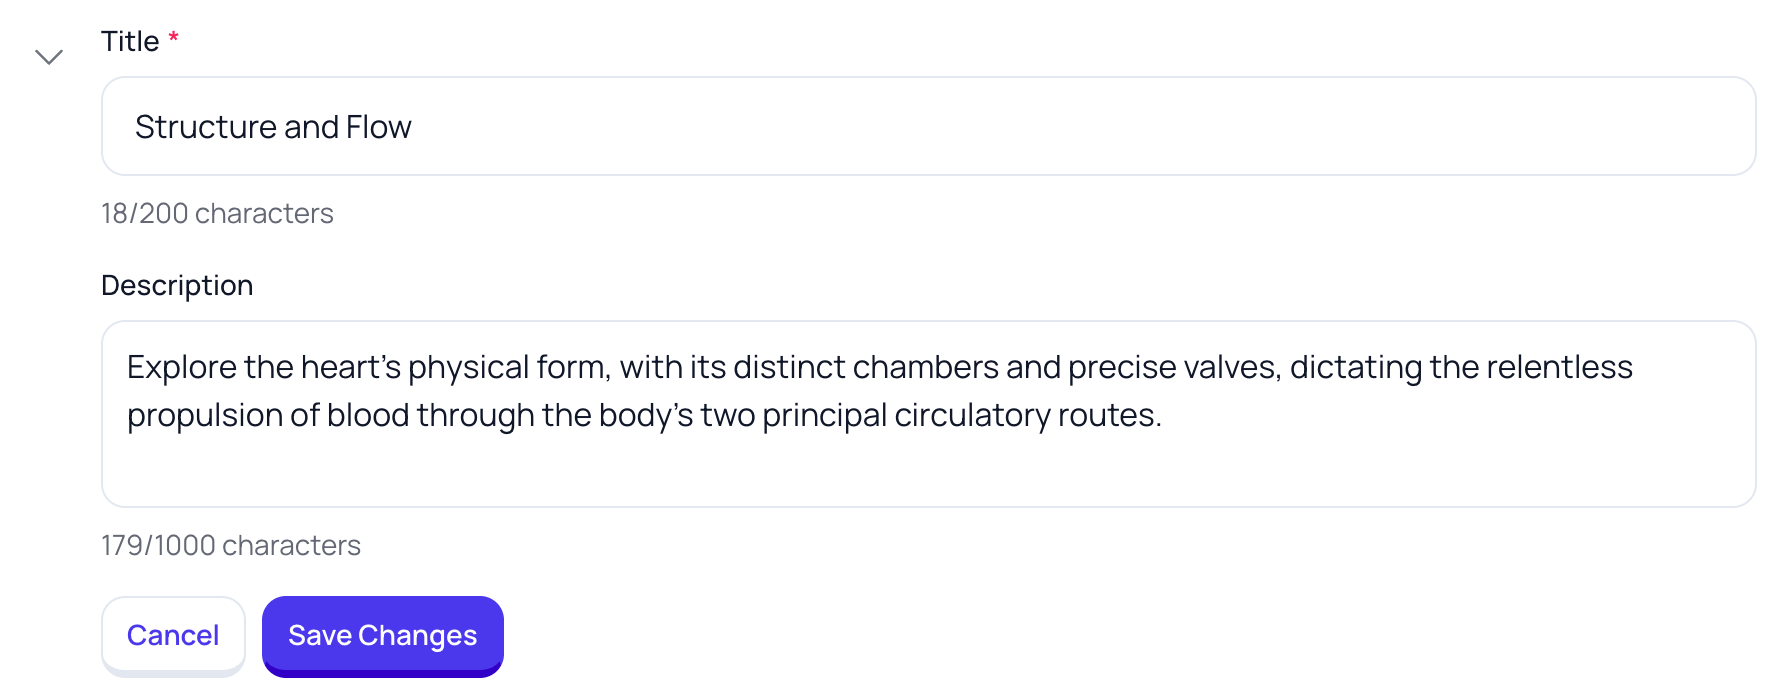
Select the Edit pencil icon next to the module header to change the module title and descriptions.
Quizzes

Select the T icon to change the quiz section title. Select the Edit pencil icon next to any quiz to open the question editor.
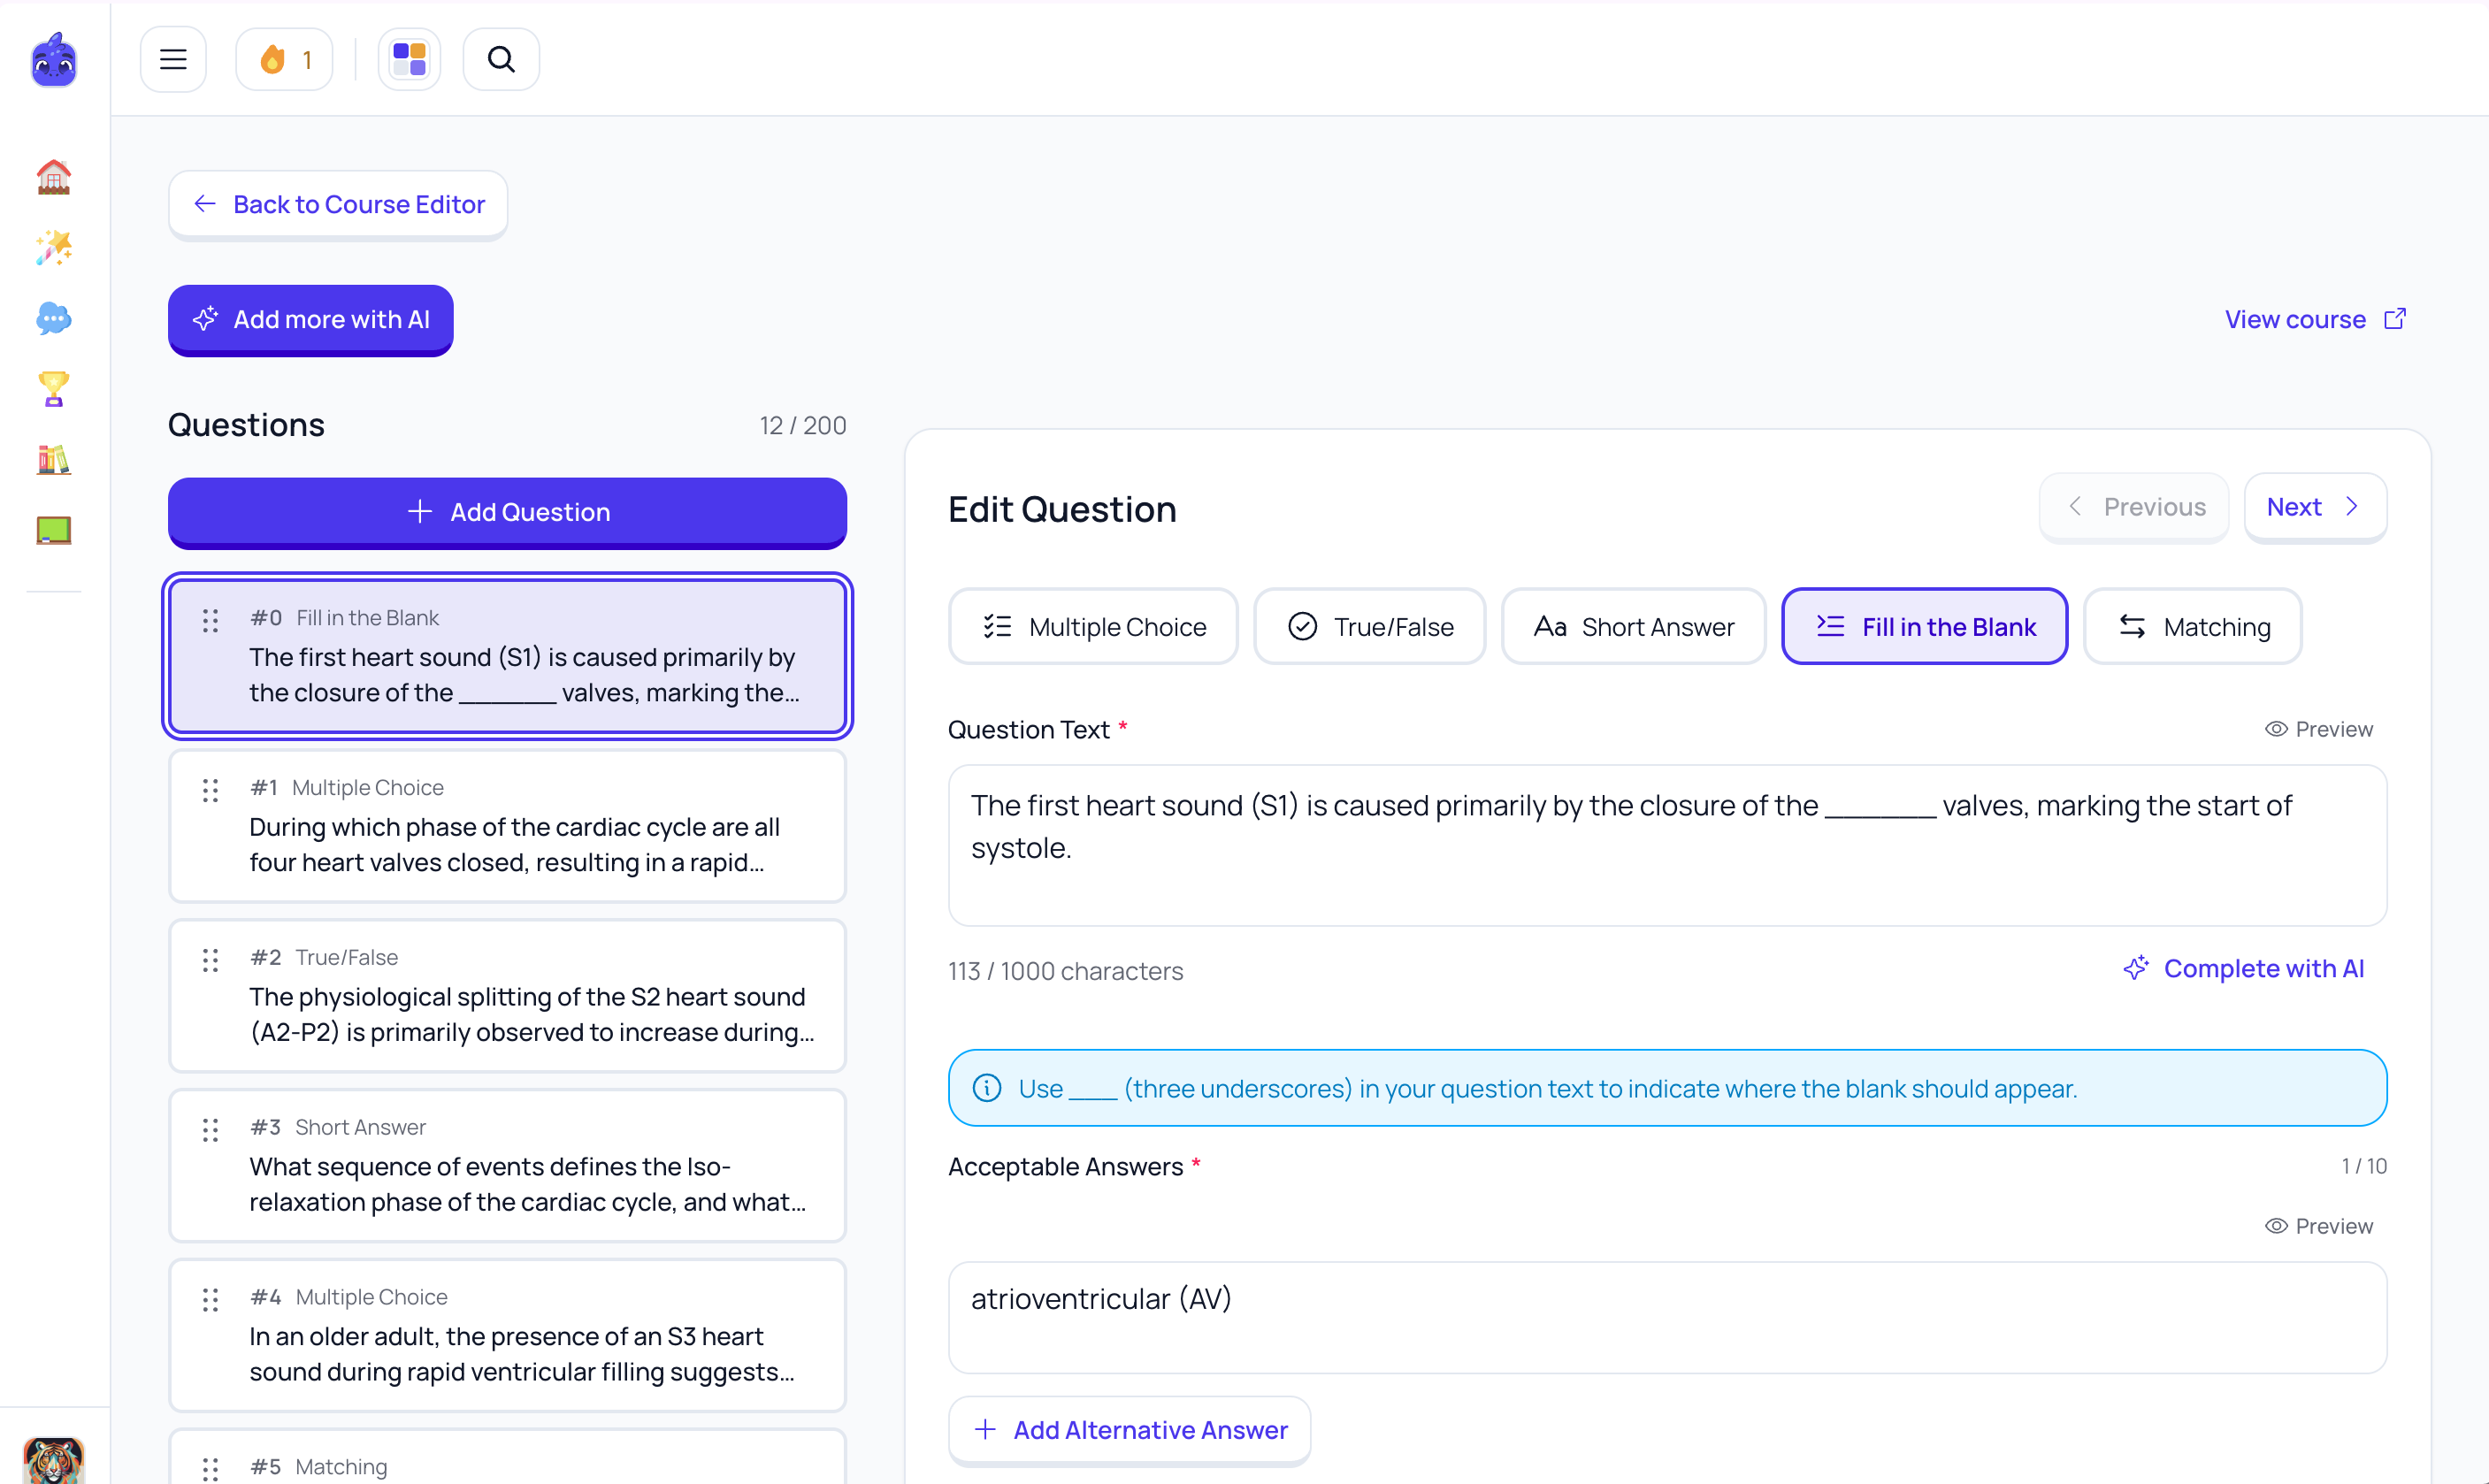
Question list (left panel)
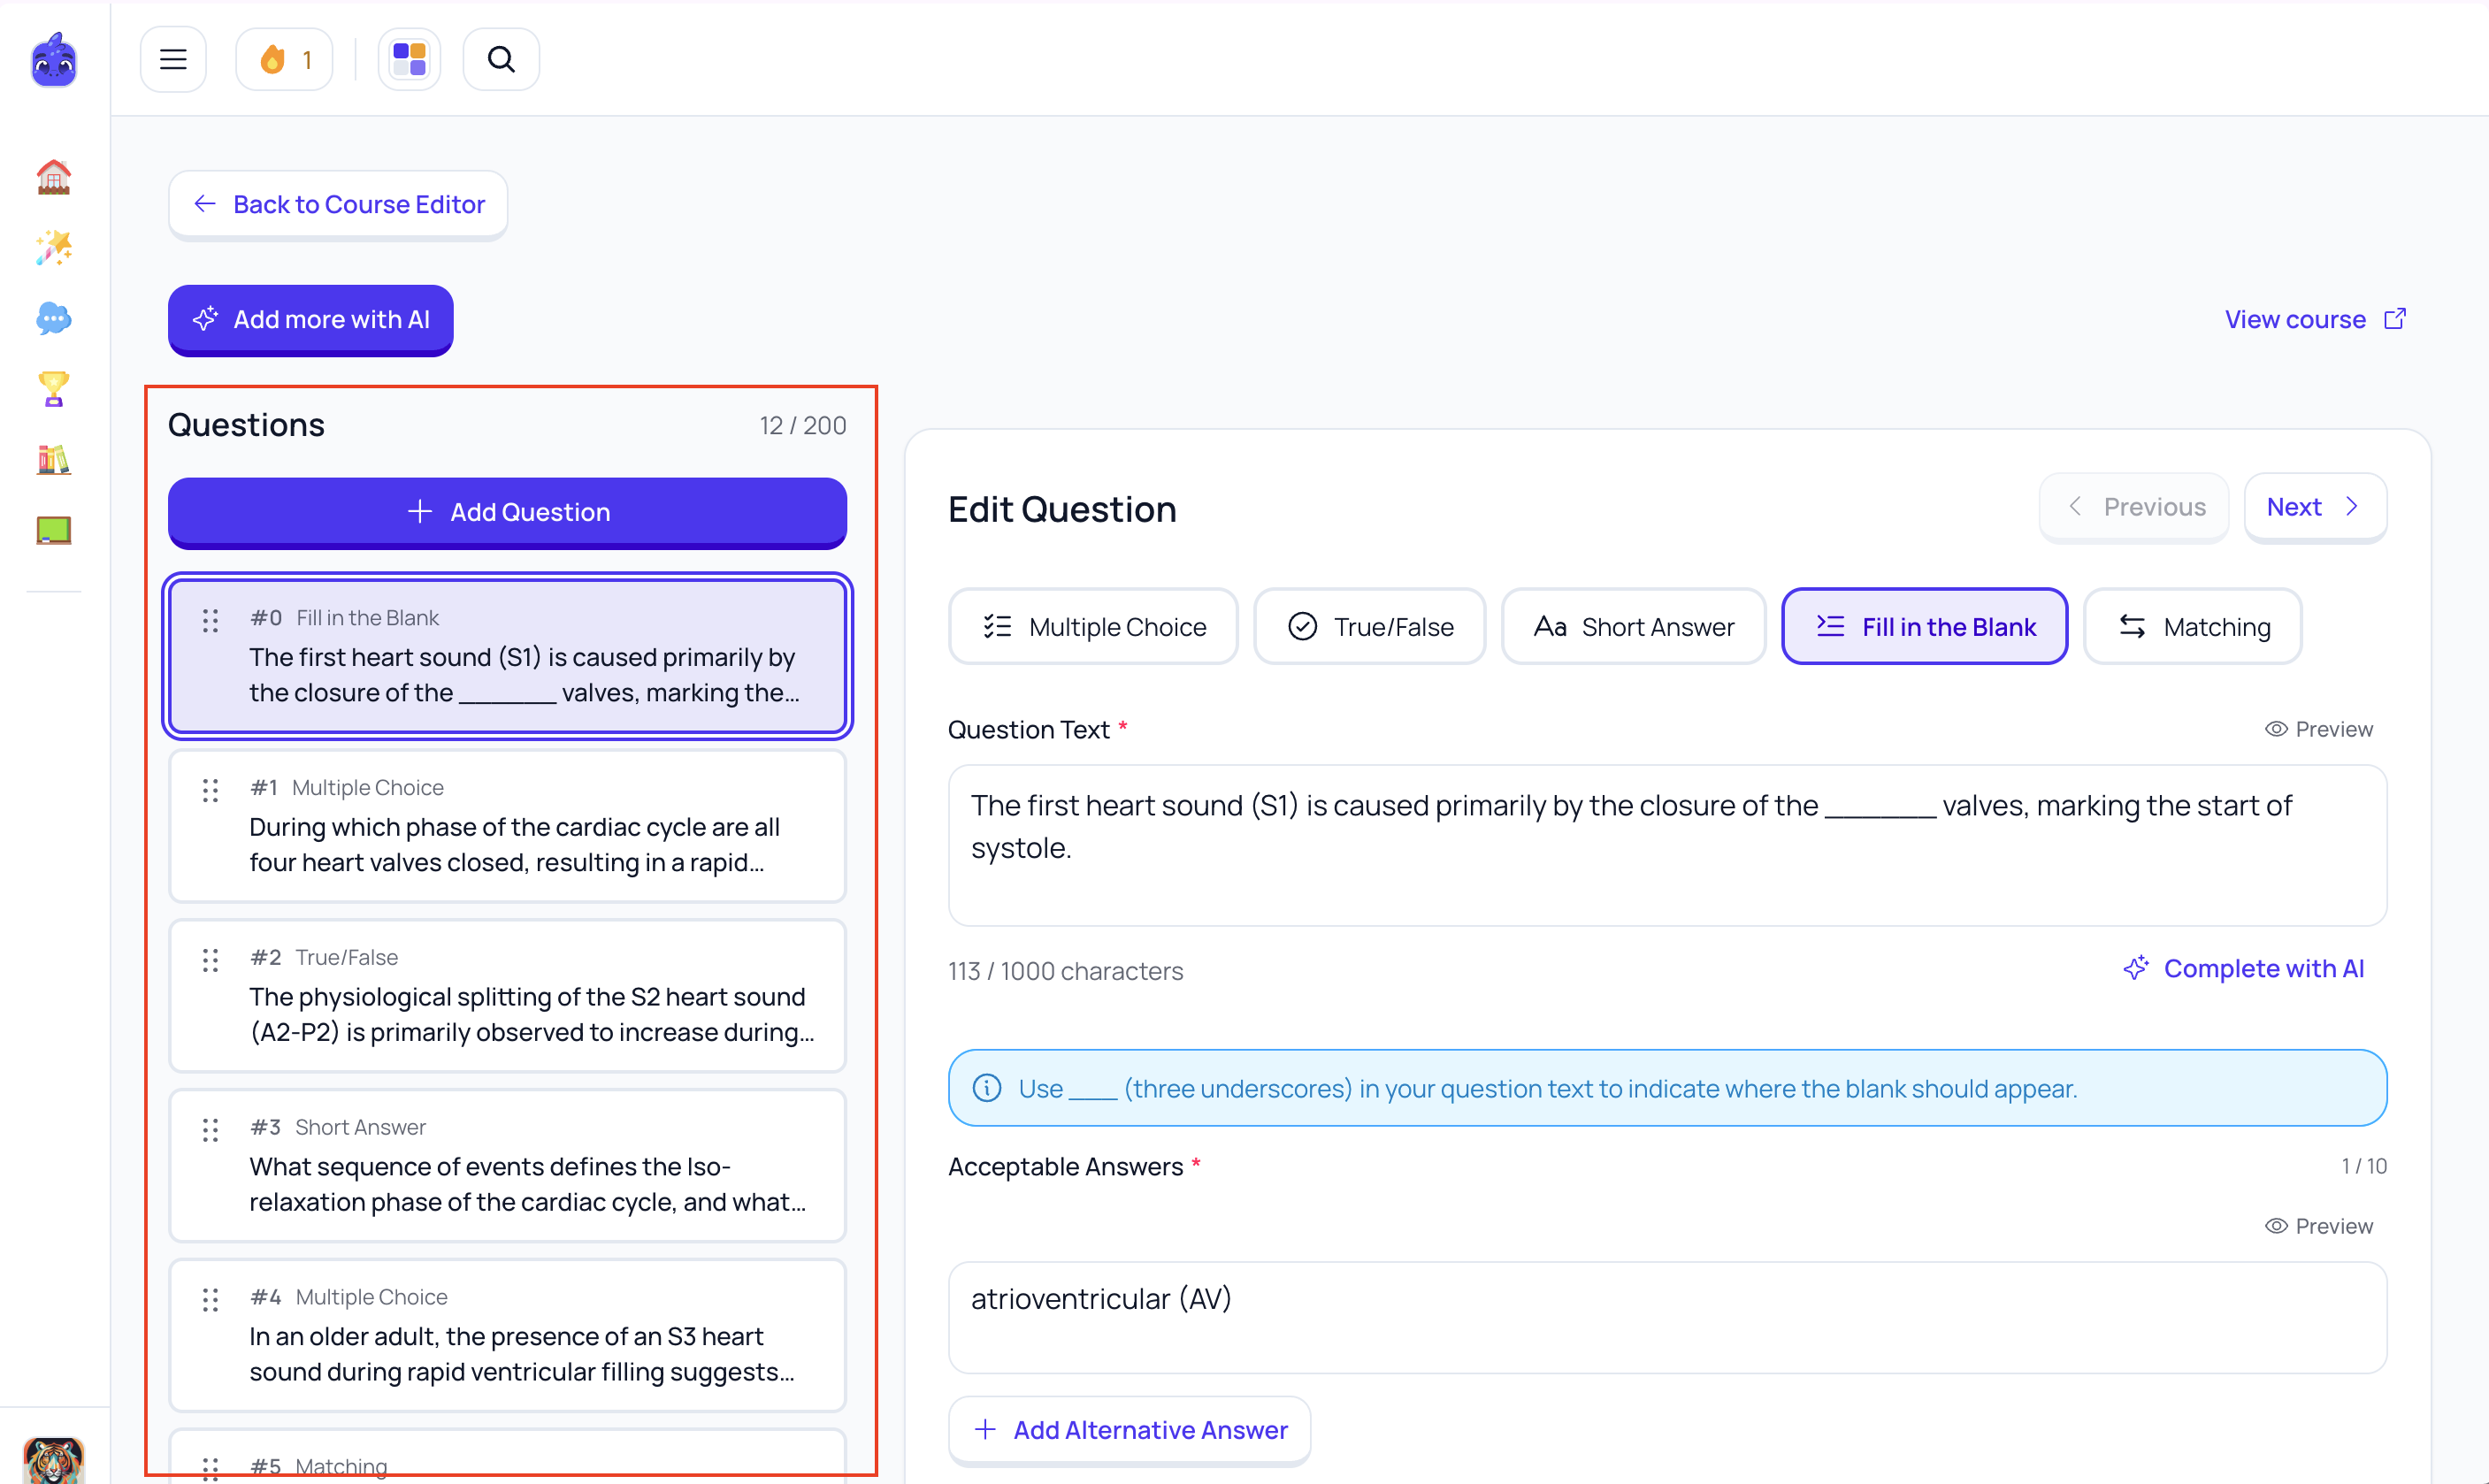
- See all questions at a glance
- Drag and drop to reorder
- Click any question to edit it
- Green checkmark = complete, warning icon = needs attention
Question editor (right panel)
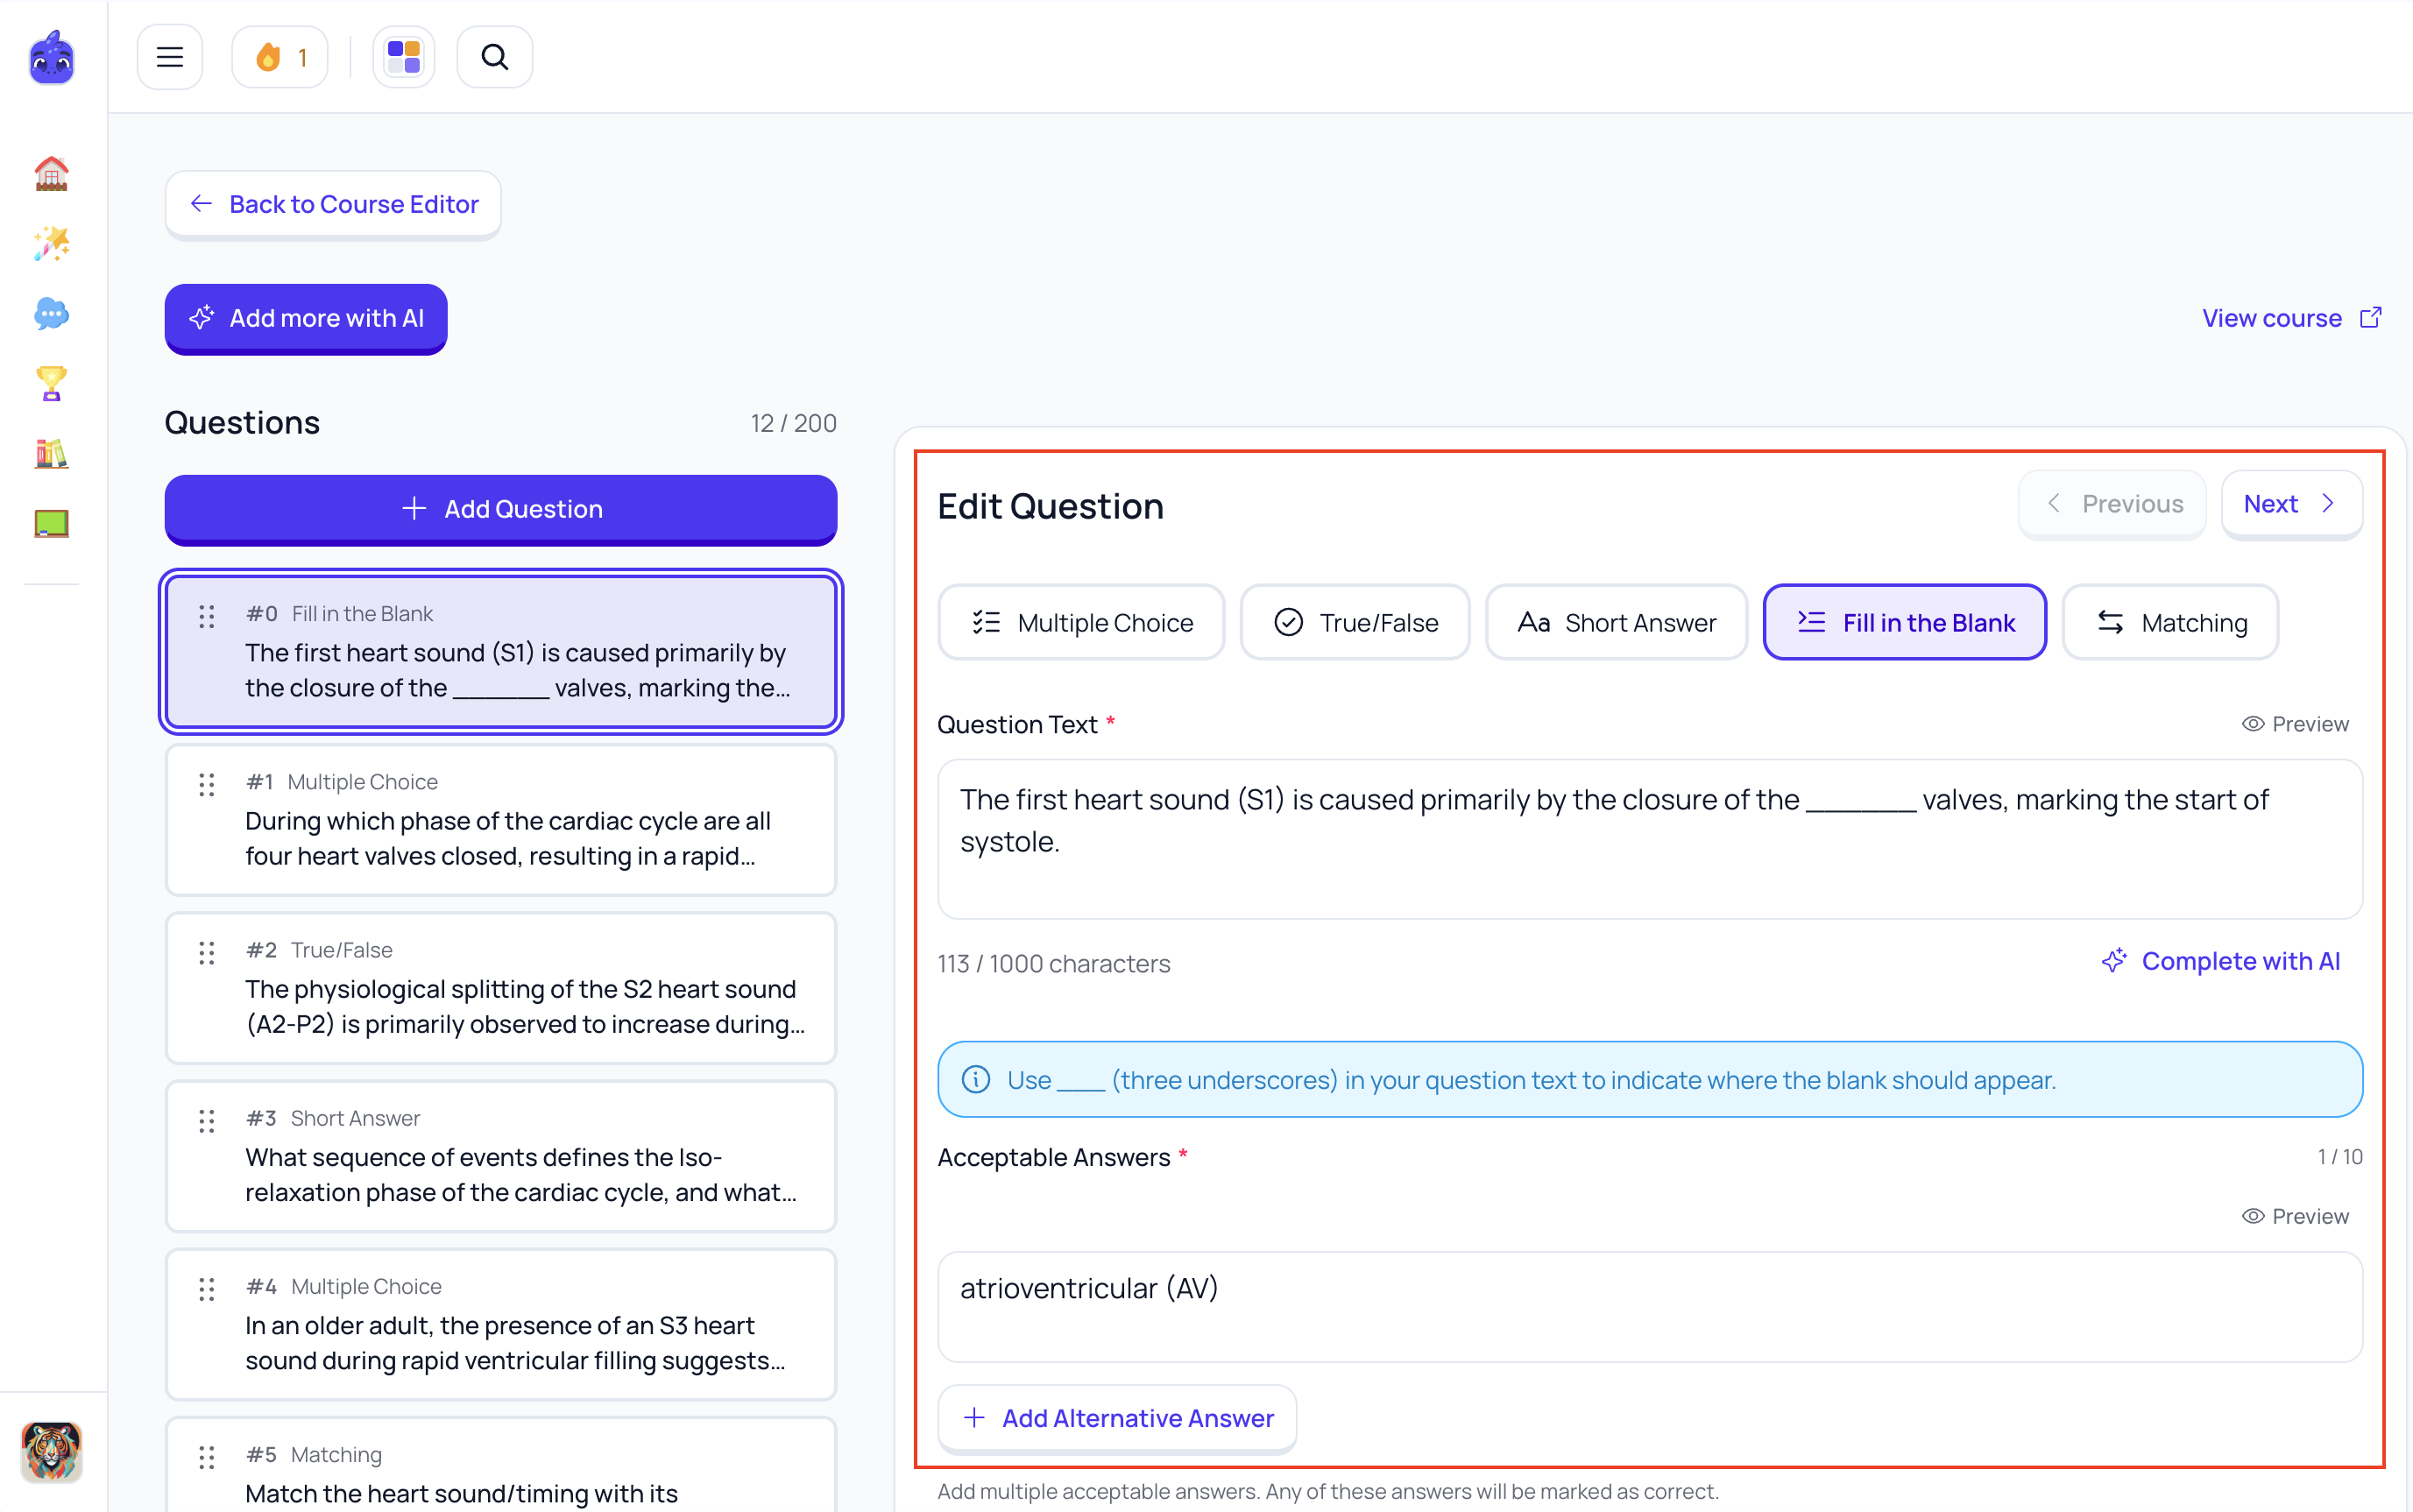
- Question Text— The question itself. supports rich text.
- Question Type— Multiple Choice, True/False, Short Answer, Fill in the Blank, or Matching
- Answers— Add, edit, or remove answer options
- Correct Answer— Select the Correct answercheckmark to mark which answer(s) are correct
- Explanation— (Optional) Shows after answering to help learners understand
- Image— Add an image to the question (great for diagrams and charts)
Adding & Removing Questions:
Select + Add Question to manually enter a new question. Alternatively, select Add more with AI to go through the generation process again and create more content for your Course.
Select the trash icon on any question to delete it. Use drag handles to reorder questions.
Flashcards
Click on any Flashcard Set module to open the flashcard editor.
Flashcard list (left panel)
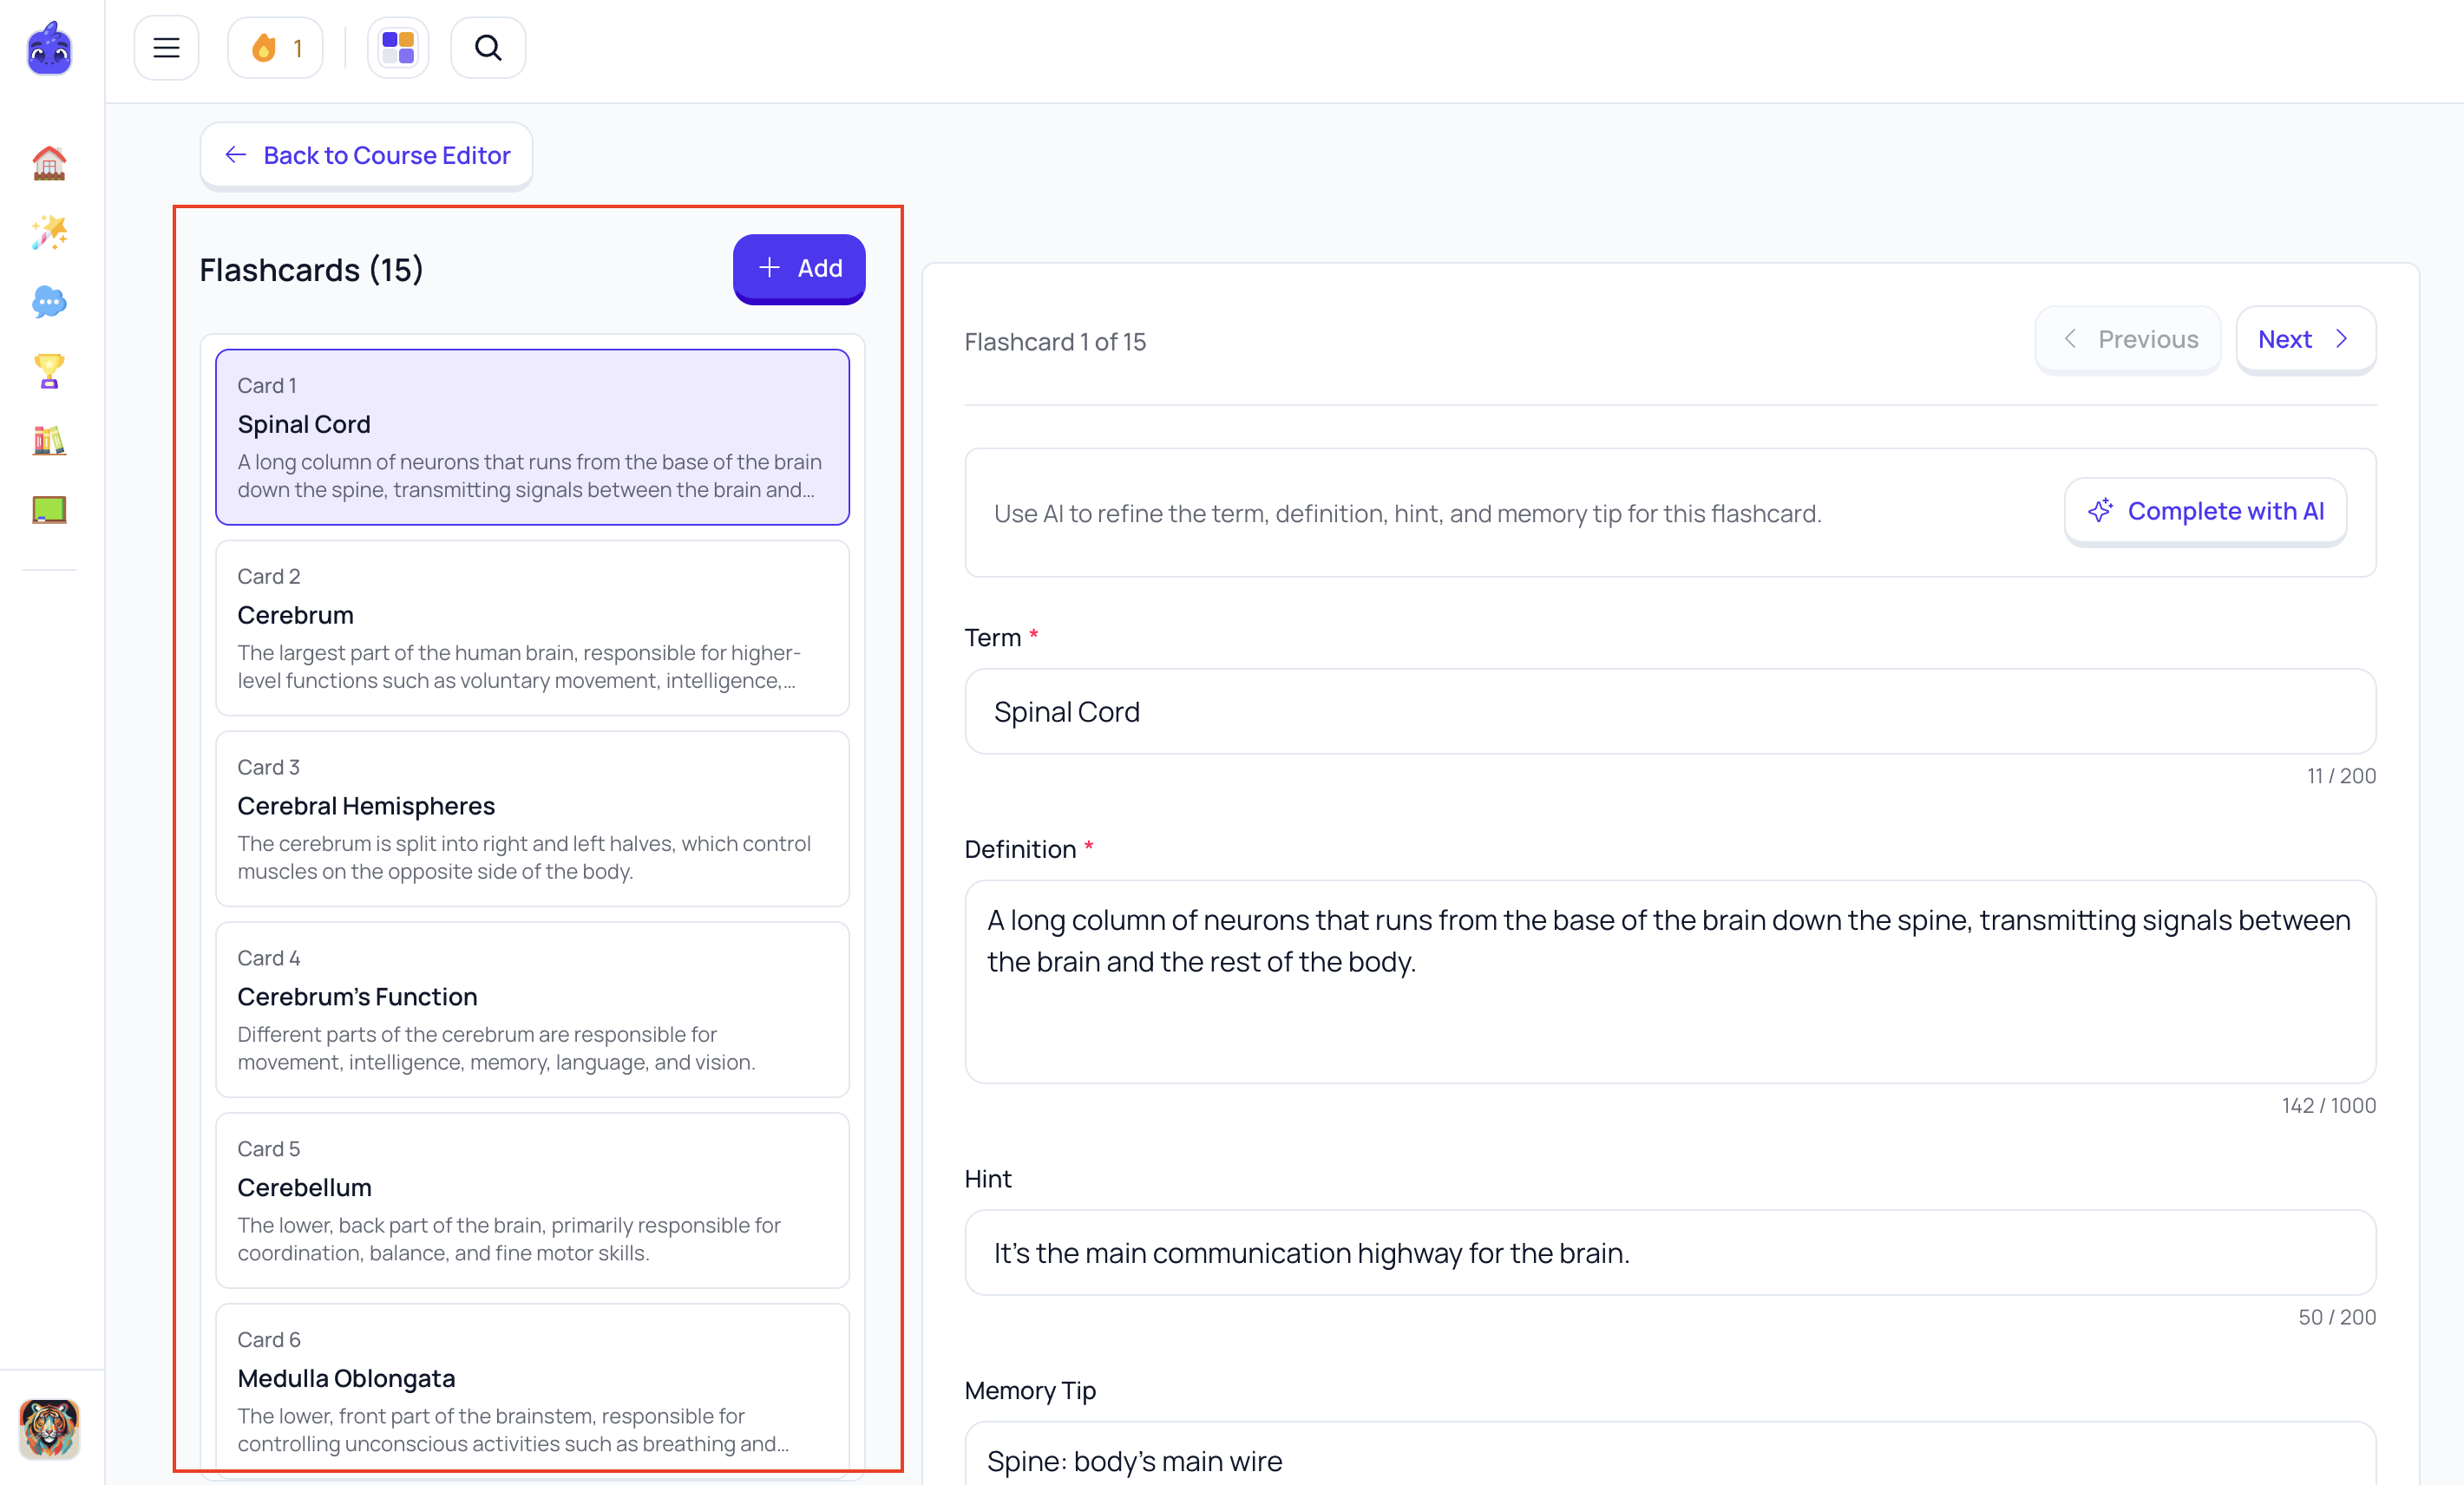
- See all cards in the set
- Click any card to edit it
- Navigate with arrow buttons or keyboard
Flashcard editor (right panel)
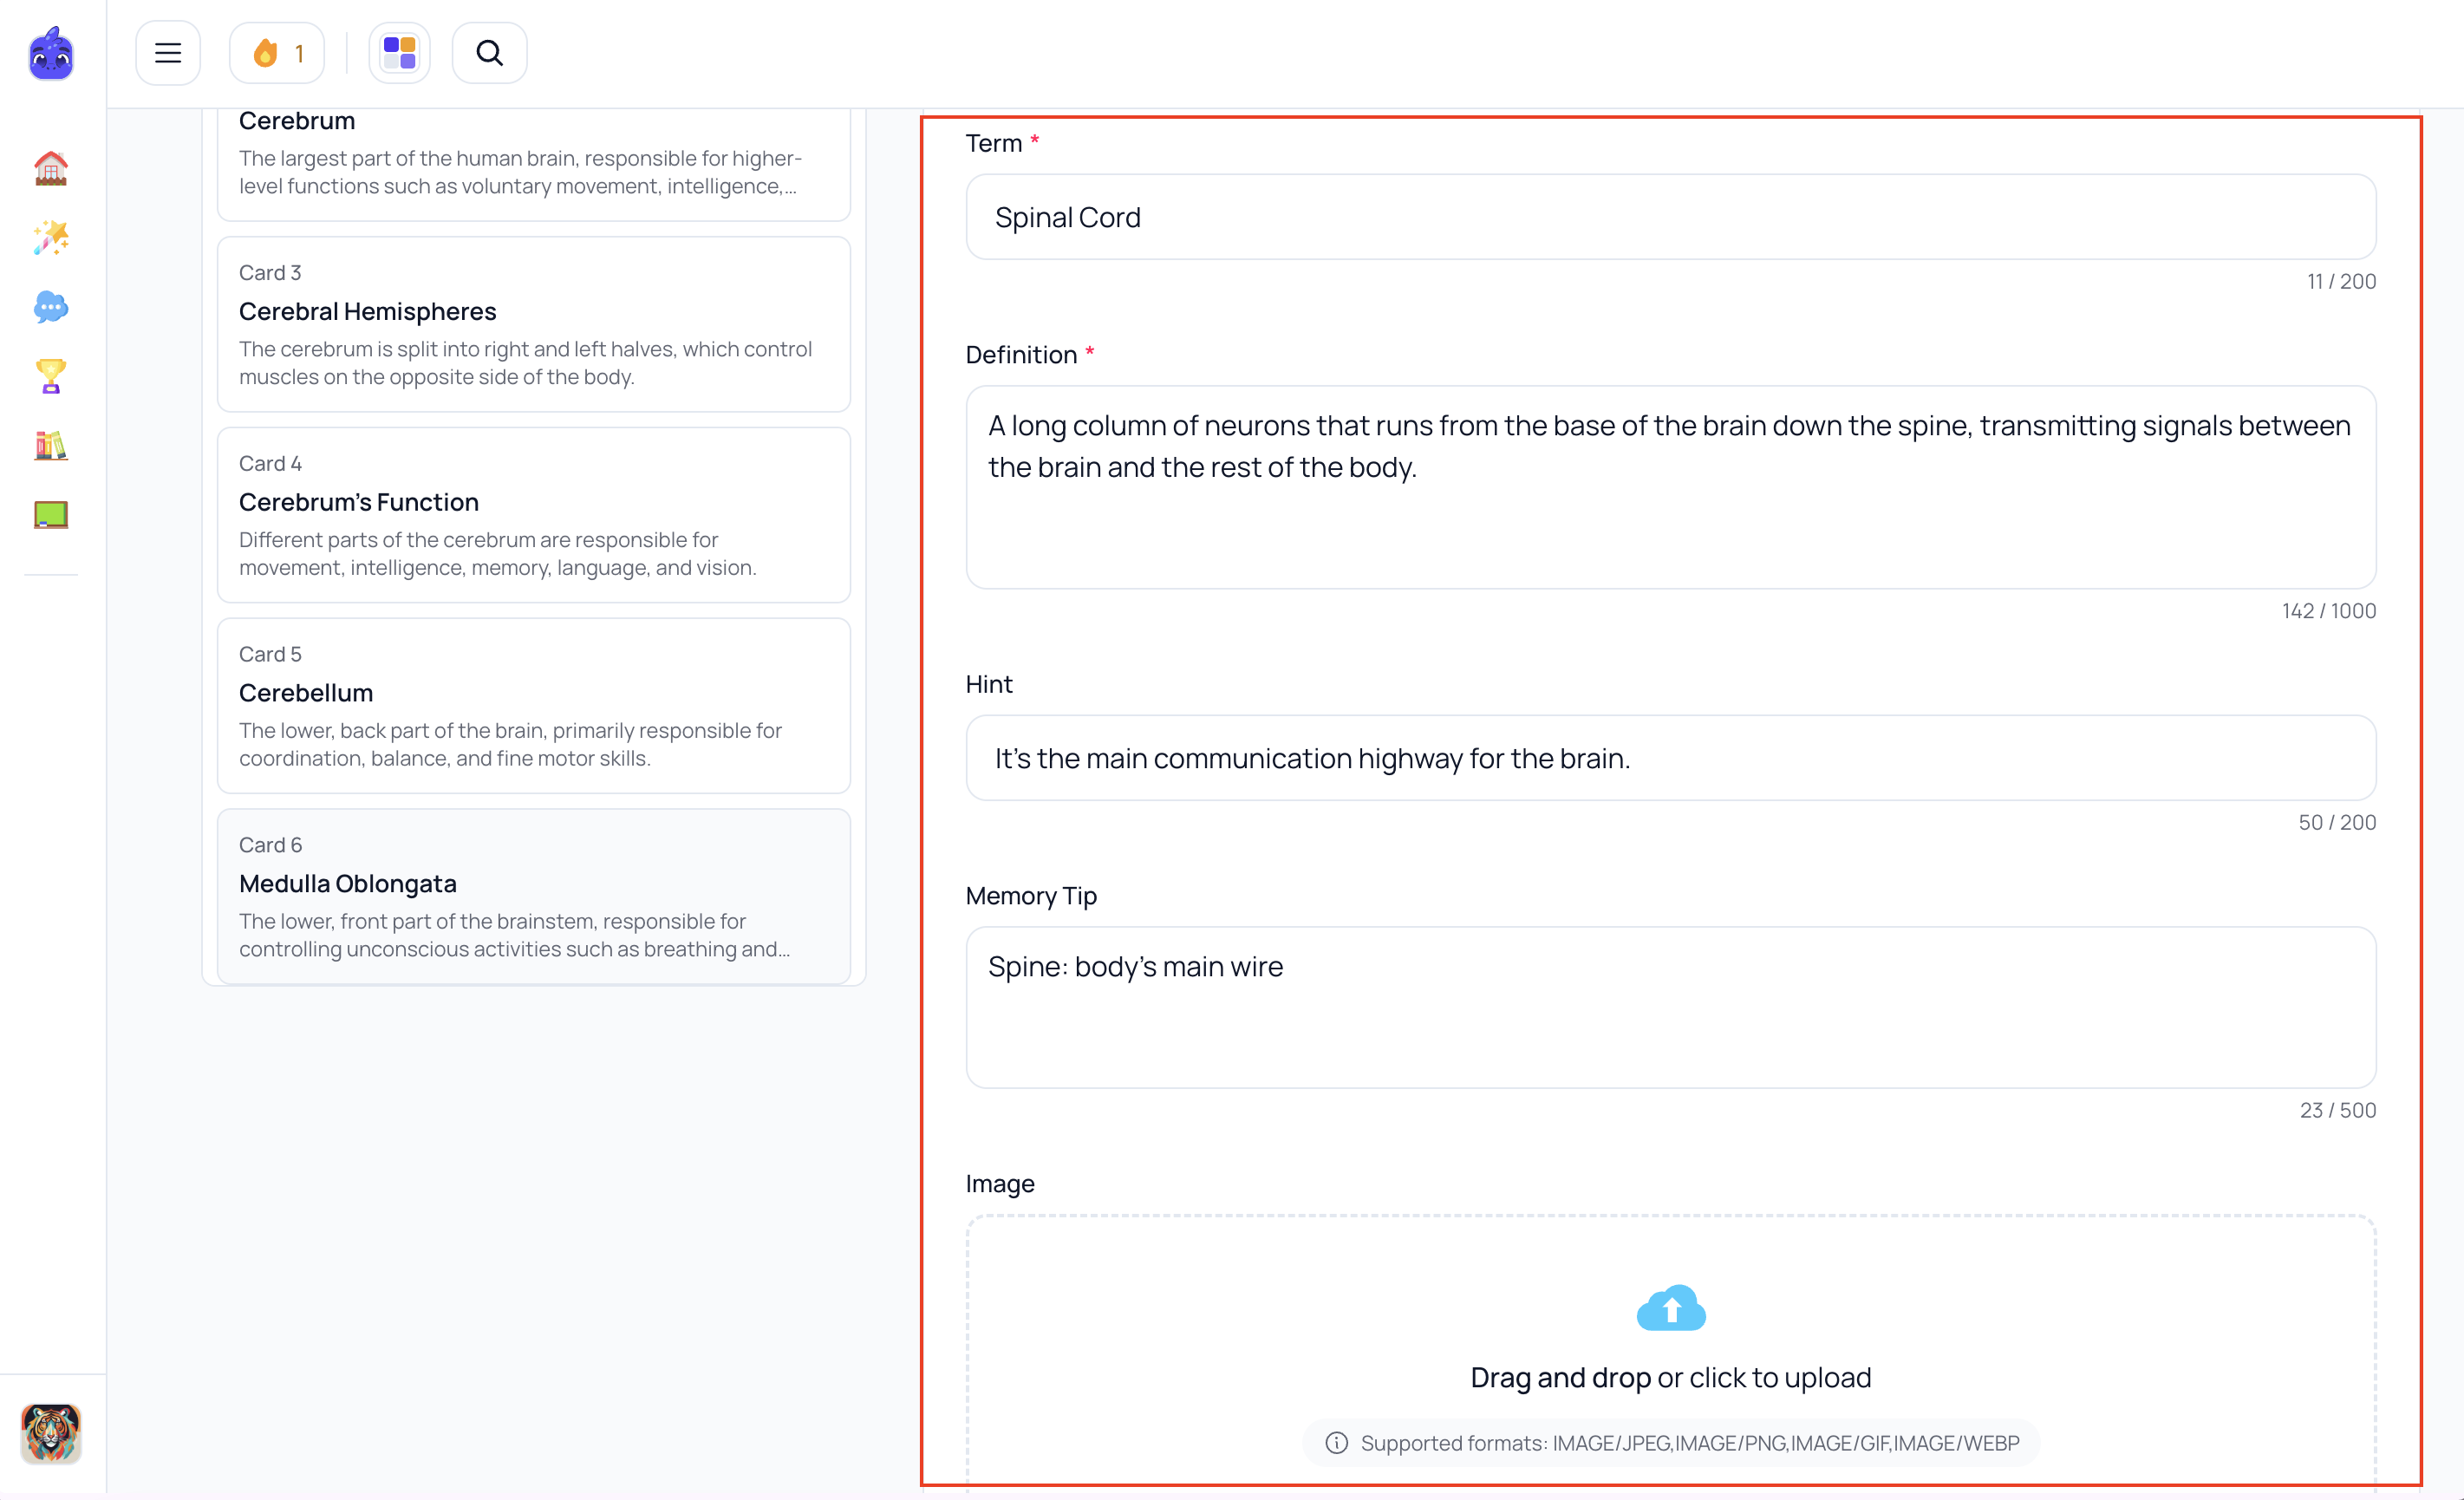
Term / Front— What appears on the front of the card Definition / Back— The answer or explanation on the back Hint— Optional clue shown before flipping (helps with difficult cards) Memory Tip— Optional mnemonic or memory aid Image— Add an image to help with visual learning
Adding & Removing Flashcards
Select + Add Flashcard to create a new card
- Select the trash icon to delete a card
- Cards are automatically saved as you edit
Study Notes

Select the T icon to change the Study Notes section title. Select the Edit pencil icon next to any Study Notes section to open the question editor.
Formatting toolbarB— Bold text I— Italic text H1— Heading BulletList— Bullet points NumberedList— Numbered list
Note: Study Notes supportMarkdown.
Features
- Autosaves as you type
- Full rich text editing
- Supports headers, lists, bold, italic
- Great for summarizing key concepts