Podcast
Questions and Answers
What is the primary risk associated with the switching oil in on-load tap-changers?
What is the primary risk associated with the switching oil in on-load tap-changers?
What precaution must be taken before removing the on-load tap-changer cover?
What precaution must be taken before removing the on-load tap-changer cover?
Which is a mandatory action when emptying the diverter switch oil compartment?
Which is a mandatory action when emptying the diverter switch oil compartment?
What should be done with the bleeder valve during maintenance work on the on-load tap-changer?
What should be done with the bleeder valve during maintenance work on the on-load tap-changer?
Signup and view all the answers
Which of the following is strictly forbidden during maintenance on the on-load tap-changer?
Which of the following is strictly forbidden during maintenance on the on-load tap-changer?
Signup and view all the answers
What must be ensured about the area around the on-load tap-changer during operation?
What must be ensured about the area around the on-load tap-changer during operation?
Signup and view all the answers
Why is adequate ventilation important during maintenance of the on-load tap-changer?
Why is adequate ventilation important during maintenance of the on-load tap-changer?
Signup and view all the answers
What is a key characteristic of the oil contained in on-load tap-changers?
What is a key characteristic of the oil contained in on-load tap-changers?
Signup and view all the answers
What is the maximum weight of the tap changer parts as specified?
What is the maximum weight of the tap changer parts as specified?
Signup and view all the answers
Which component must be constructed according to the sealing surface of the tap changer head?
Which component must be constructed according to the sealing surface of the tap changer head?
Signup and view all the answers
What is recommended for positioning the studs for mounting the tap changer head?
What is recommended for positioning the studs for mounting the tap changer head?
Signup and view all the answers
What is the approximate weight of the motor drive MA 9?
What is the approximate weight of the motor drive MA 9?
Signup and view all the answers
What should be done with the tap changer parts until assembly?
What should be done with the tap changer parts until assembly?
Signup and view all the answers
What is the weight of the protective relay RS 2001?
What is the weight of the protective relay RS 2001?
Signup and view all the answers
Which part is specifically noted to be packed with the tap changer?
Which part is specifically noted to be packed with the tap changer?
Signup and view all the answers
How are the tap changer parts recommended to be handled until just before installation?
How are the tap changer parts recommended to be handled until just before installation?
Signup and view all the answers
What is essential to ensure when installing the tap changer into the supporting structure?
What is essential to ensure when installing the tap changer into the supporting structure?
Signup and view all the answers
Which section outlines the instructions for connecting the tap winding and the tap changer take-off terminal?
Which section outlines the instructions for connecting the tap winding and the tap changer take-off terminal?
Signup and view all the answers
What must be avoided when lifting the tap changer into its mounting position?
What must be avoided when lifting the tap changer into its mounting position?
Signup and view all the answers
What is the final installation requirement for the tap changer after mounting the bell-type tank?
What is the final installation requirement for the tap changer after mounting the bell-type tank?
Signup and view all the answers
Which mounting component is recommended for use with a bell-type cover?
Which mounting component is recommended for use with a bell-type cover?
Signup and view all the answers
What is emphasized regarding the tap changer's position during installation?
What is emphasized regarding the tap changer's position during installation?
Signup and view all the answers
What is a crucial consideration when mounting the tap changer into the tank?
What is a crucial consideration when mounting the tap changer into the tank?
Signup and view all the answers
In which section of the installation guide is the procedure for mounting the tap changer found?
In which section of the installation guide is the procedure for mounting the tap changer found?
Signup and view all the answers
What is the voltage rating for the tap changer head type H lil?
What is the voltage rating for the tap changer head type H lil?
Signup and view all the answers
What is the primary function of the bleeding facility mentioned in the content?
What is the primary function of the bleeding facility mentioned in the content?
Signup and view all the answers
Which connection is designed only for the oil filter according to the information?
Which connection is designed only for the oil filter according to the information?
Signup and view all the answers
What is the maximum rotational orientation for the suction pipe connection?
What is the maximum rotational orientation for the suction pipe connection?
Signup and view all the answers
What is indicated by the designation 'E2' in the context of the tap changer?
What is indicated by the designation 'E2' in the context of the tap changer?
Signup and view all the answers
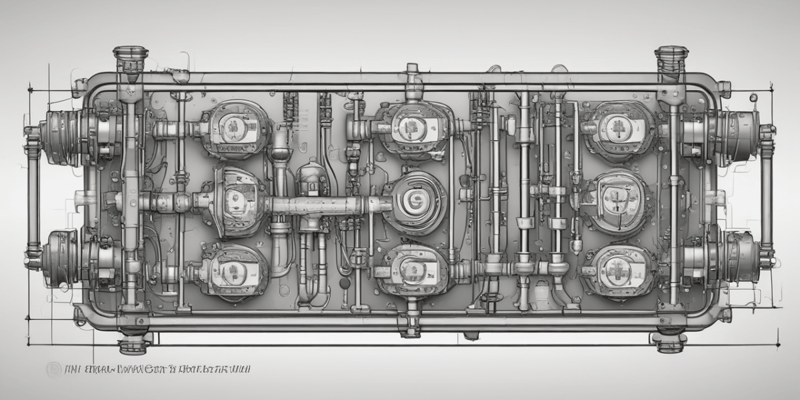
Which type of tap changer is specifically referenced in the document?
Which type of tap changer is specifically referenced in the document?
Signup and view all the answers
How thick is the connecting flange as mentioned in the content?
How thick is the connecting flange as mentioned in the content?
Signup and view all the answers
What does the letter 'Zs' likely represent in the context of the diagram?
What does the letter 'Zs' likely represent in the context of the diagram?
Signup and view all the answers
What feature does the tap changer head provide under the designation 'Eq'?
What feature does the tap changer head provide under the designation 'Eq'?
Signup and view all the answers
For what purpose is the 'Connection for protective relay' used?
For what purpose is the 'Connection for protective relay' used?
Signup and view all the answers
What action should be avoided while the tap changer is uncoupled?
What action should be avoided while the tap changer is uncoupled?
Signup and view all the answers
What needs to be done with the protective relay in relation to the circuit breakers?
What needs to be done with the protective relay in relation to the circuit breakers?
Signup and view all the answers
When should one proceed to energize the transformer?
When should one proceed to energize the transformer?
Signup and view all the answers
What is indicated by the term 'by-pass tube' in relation to the transformer?
What is indicated by the term 'by-pass tube' in relation to the transformer?
Signup and view all the answers
What should NOT be done after the protective relay has responded?
What should NOT be done after the protective relay has responded?
Signup and view all the answers
What signifies a proper function of the motor drive housing?
What signifies a proper function of the motor drive housing?
Signup and view all the answers
What must be verified regarding the circuit breakers during testing?
What must be verified regarding the circuit breakers during testing?
Signup and view all the answers
What should be ensured about the condition of the control devices in the motor drive unit?
What should be ensured about the condition of the control devices in the motor drive unit?
Signup and view all the answers
The tap changer should always be lowered into the mounting flange without any support.
The tap changer should always be lowered into the mounting flange without any support.
Signup and view all the answers
An oil-resistant gasket is used on the mounting flange to prevent leaks.
An oil-resistant gasket is used on the mounting flange to prevent leaks.
Signup and view all the answers
Spacer blocks can be temporarily left in place while setting up the bell-type cover.
Spacer blocks can be temporarily left in place while setting up the bell-type cover.
Signup and view all the answers
The screening ring of the tap changer must be protected during installation process.
The screening ring of the tap changer must be protected during installation process.
Signup and view all the answers
After mounting the bell-type cover, the tap changer head should be measured for lead connections.
After mounting the bell-type cover, the tap changer head should be measured for lead connections.
Signup and view all the answers
The tap changer head must be bolted to the transformer after the tap changer is installed.
The tap changer head must be bolted to the transformer after the tap changer is installed.
Signup and view all the answers
The tap changer needs to be raised by a lifting device in its final positioned state after the bell-type cover setup.
The tap changer needs to be raised by a lifting device in its final positioned state after the bell-type cover setup.
Signup and view all the answers
It is suggested to clean the sealing surfaces before attaching the tap changer head.
It is suggested to clean the sealing surfaces before attaching the tap changer head.
Signup and view all the answers
The tap changer must be installed in an exact horizontal position to ensure proper functioning.
The tap changer must be installed in an exact horizontal position to ensure proper functioning.
Signup and view all the answers
It is necessary to ensure ample clearance for the tap changer to rise to its final installation position after mounting.
It is necessary to ensure ample clearance for the tap changer to rise to its final installation position after mounting.
Signup and view all the answers
The mounting flange should only be used with a cover type that is not bell-shaped.
The mounting flange should only be used with a cover type that is not bell-shaped.
Signup and view all the answers
Connected leads must exert some force on the tap changer for it to function correctly.
Connected leads must exert some force on the tap changer for it to function correctly.
Signup and view all the answers
Installing the tap changer incorrectly can lead to significant operational risks.
Installing the tap changer incorrectly can lead to significant operational risks.
Signup and view all the answers
Instructions for connecting the tap winding and the tap changer take-off terminal are located in section 5.
Instructions for connecting the tap winding and the tap changer take-off terminal are located in section 5.
Signup and view all the answers
The tap changer is designed to be lifted directly without consideration of its position in the supporting structure.
The tap changer is designed to be lifted directly without consideration of its position in the supporting structure.
Signup and view all the answers
The installation procedure for the tap changer does not require any specific sections to be followed.
The installation procedure for the tap changer does not require any specific sections to be followed.
Signup and view all the answers
The model type referenced for the on-load tap changer is H II 400 D.
The model type referenced for the on-load tap changer is H II 400 D.
Signup and view all the answers
The guidance pin is labeled as Z in the documentation.
The guidance pin is labeled as Z in the documentation.
Signup and view all the answers
The maximum voltage rating for the on-load tap changer mentioned is 145 kV.
The maximum voltage rating for the on-load tap changer mentioned is 145 kV.
Signup and view all the answers
It is permissible to install the tap changer into any type of tank.
It is permissible to install the tap changer into any type of tank.
Signup and view all the answers
The document lists the on-load tap changer as having tie-in resistors.
The document lists the on-load tap changer as having tie-in resistors.
Signup and view all the answers
The attachment for the motor drive unit is indicated as MA 9.
The attachment for the motor drive unit is indicated as MA 9.
Signup and view all the answers
The drawing shows a changeover selector turned to sectional plane 8750.
The drawing shows a changeover selector turned to sectional plane 8750.
Signup and view all the answers
The document emphasizes the importance of the bleeder valve during maintenance on the tap changer.
The document emphasizes the importance of the bleeder valve during maintenance on the tap changer.
Signup and view all the answers
The tap changer components are recommended to be handled gently until just before installation.
The tap changer components are recommended to be handled gently until just before installation.
Signup and view all the answers
The label 'Eq' refers to a specific feature of the tap changer head providing a mechanism for electrical connections.
The label 'Eq' refers to a specific feature of the tap changer head providing a mechanism for electrical connections.
Signup and view all the answers
The maximum weight specified for the tap changer parts is 1000 kilograms.
The maximum weight specified for the tap changer parts is 1000 kilograms.
Signup and view all the answers
Reinhausen Maschinenfabrik is located in Regensburg, Germany.
Reinhausen Maschinenfabrik is located in Regensburg, Germany.
Signup and view all the answers
The fax number for Reinhausen Maschinenfabrik is (+49) 9 4 1 / 4 0 90-111.
The fax number for Reinhausen Maschinenfabrik is (+49) 9 4 1 / 4 0 90-111.
Signup and view all the answers
The year mentioned in the printed document is 2023.
The year mentioned in the printed document is 2023.
Signup and view all the answers
The telex number provided is 65881.
The telex number provided is 65881.
Signup and view all the answers
The postal code for Reinhausen Maschinenfabrik is D-93025.
The postal code for Reinhausen Maschinenfabrik is D-93025.
Signup and view all the answers
The tap changer cover remains open during the entire drying process.
The tap changer cover remains open during the entire drying process.
Signup and view all the answers
A temperature of 90 °C is maintained for about 3 to 4 hours during the drying process.
A temperature of 90 °C is maintained for about 3 to 4 hours during the drying process.
Signup and view all the answers
The tap changer should always be overrun for proper alignment during adjustment.
The tap changer should always be overrun for proper alignment during adjustment.
Signup and view all the answers
To facilitate sufficient drying, the temperature can be increased by about 10°C per hour.
To facilitate sufficient drying, the temperature can be increased by about 10°C per hour.
Signup and view all the answers
The duration of the drying procedure is typically shorter than that of the transformer.
The duration of the drying procedure is typically shorter than that of the transformer.
Signup and view all the answers
A nominal width of 25 mm is recommended for the connecting pipe used in the drying process.
A nominal width of 25 mm is recommended for the connecting pipe used in the drying process.
Signup and view all the answers
The tap changer adjustment position should be checked using the inspection window.
The tap changer adjustment position should be checked using the inspection window.
Signup and view all the answers
The tap changer cover must be opened periodically to ensure it remains vacuum-proof.
The tap changer cover must be opened periodically to ensure it remains vacuum-proof.
Signup and view all the answers
Study Notes
Safety Precautions
- On-load tap-changer oil is flammable; handle with care to avoid fire hazards.
- Explosive switching gases may be present in various areas of the tap-changer; ensure no open flames or sparks nearby.
- Use only conductive and grounded hoses and equipment when handling flammable liquids.
- Deactivate auxiliary circuits before working on the tap-changer cover and avoid using electrical tools that could create sparks.
Maintenance and Operation
- Open the bleeder valve while the stop valve between the oil conservator and diverter switch is open, allowing gas to escape safely.
- Adequate ventilation is essential while working on the tap-changer to disperse switching gases.
- Once bleeding is complete and oil flows, close the bleeder valve first, then the stop valve.
Specifications
- Approximate weight of the tap-changer type H is 240 kg; the variant H 111 400 D-145 weighs around 265 kg.
- Different motor drives (MA 7: ~90 kg, MA 9: ~60 kg) and protective relays (RS 2001: 3.5 kg) accompany the tap-changer.
Installation Instructions
- Store tap-changer parts in a dry location until ready for assembly; keep them sealed in their protective covering until installation.
- A mounting flange is necessary for securing the tap-changer head to the transformer cover.
- Position studs accurately with the aid of a drilling template to ensure correct installation.
Installation Procedure
- Lift the tap-changer into the supporting structure with care to avoid any forces on the tap-changer.
- Ensure proper clearance is available for the tap-changer to rise to its final installation position.
- Protective relays must be integrated into the circuit to immediately disconnect the transformer upon activation.
Final Precautions
- Ensure that the motor drive is not operated while the tap-changer is un-coupled.
- Cover all electrical equipment functions and control devices for safety before energizing the transformer after maintenance.
- Reset the protective relay only after ensuring the tap-changer has been addressed following activation.
Tap Changer Attachment Process
- The tap changer is mounted onto the transformer cover via a mounting flange.
- Clean the sealing surfaces before placing an oil-resistant gasket on the mounting flange.
- Temporarily use spacer blocks to ensure proper installation height prior to attaching the bell-type cover.
- Ensure avoidance of damage to screening rings and tap changer terminals during installation.
Installation Steps
- The tap changer must be lifted and positioned accurately into the supporting structure.
- It should be securely fastened in the correct mounting position and maintained in a vertical orientation.
- Connected leads must not apply any force on the tap changer after installation.
- Adequate clearance is necessary for the tap changer to be raised to its final position post bell-type tank installation.
Temperature Controls
- Maintain a constant temperature of approximately 90 °C during the drying process.
- Increase the kerosene vapor temperature by 10°C per hour, up to a maximum of 125°C for effective drying.
- Drying duration should align with the transformer drying procedure, typically around 3 to 4 hours.
Post-Installation Procedures
- After the transformer ratio test, the tap changer must be adjusted back to the designated position as noted in the equipment connection diagram.
- Ensure through an inspection window that the tap changer has not surpassed the end positions indicated by the connection diagram.
Important Notes
- The tap changer cover is vacuum-proof, necessitating careful handling during the connection of the by-pass tube to facilitate drying.
- Use a connecting pipe to connect the transformer tank to the tap changer head for drying purposes.
- Maintain vigilant observation of temperature and installation protocols for ensuring optimal performance and safety.
Studying That Suits You
Use AI to generate personalized quizzes and flashcards to suit your learning preferences.
Related Documents
Description
This quiz covers the operating instructions for Type H On-Load Tap Changers, emphasizing the importance of safety precautions when handling flammable switching oil and explosive switching gases. Understanding these instructions is crucial for safe and effective operation.