Podcast
Questions and Answers
What is an important skill for becoming a strong Pro Tools user?
What is an important skill for becoming a strong Pro Tools user?
- Editing images
- Creating video content
- Importing audio
- Recording performances (correct)
The tempo in music is measured in minutes per beat.
The tempo in music is measured in minutes per beat.
False (B)
What do you need to set up before using a click track?
What do you need to set up before using a click track?
Meter and tempo
A click track is used to indicate the _____ of a performance.
A click track is used to indicate the _____ of a performance.
Which of the following is NOT mentioned as a signal type you might encounter in recording sessions?
Which of the following is NOT mentioned as a signal type you might encounter in recording sessions?
Match the following microphone types with their descriptions:
Match the following microphone types with their descriptions:
Recording spaces do not affect the quality of microphone recordings.
Recording spaces do not affect the quality of microphone recordings.
What is the common measurement used for tempo in music?
What is the common measurement used for tempo in music?
What is the purpose of disarming a track before playback?
What is the purpose of disarming a track before playback?
The whole-file clip is referred to as the child of any subset clips related to it.
The whole-file clip is referred to as the child of any subset clips related to it.
What should you do after you finish recording before you start playback?
What should you do after you finish recording before you start playback?
After recording, it is advisable to switch to _____ mode to ensure you don't overwrite your work.
After recording, it is advisable to switch to _____ mode to ensure you don't overwrite your work.
Match the following actions with their purposes:
Match the following actions with their purposes:
What type of track is created when you select 'Create Click Track' from the Track menu?
What type of track is created when you select 'Create Click Track' from the Track menu?
The click track can be heard only during playback if the 'Only During Record' option is selected.
The click track can be heard only during playback if the 'Only During Record' option is selected.
What is the purpose of a countoff in recording?
What is the purpose of a countoff in recording?
The top button in each track's I/O view is known as the ______ path selector.
The top button in each track's I/O view is known as the ______ path selector.
Match the click track behaviors with their descriptions:
Match the click track behaviors with their descriptions:
Which option is NOT available in the Click/Countoff Options dialog?
Which option is NOT available in the Click/Countoff Options dialog?
The click track will always be active during recording.
The click track will always be active during recording.
How do you check the status of your metronome?
How do you check the status of your metronome?
To set default inputs in Pro Tools, you need to go to the Setup menu and choose ______.
To set default inputs in Pro Tools, you need to go to the Setup menu and choose ______.
Match the components of the Click/Countoff Options with their roles:
Match the components of the Click/Countoff Options with their roles:
What happens when you activate the Track Input Monitor feature?
What happens when you activate the Track Input Monitor feature?
Once the settings are applied in the Click/Countoff Options, they cannot be changed.
Once the settings are applied in the Click/Countoff Options, they cannot be changed.
What should be avoided to prevent feedback while recording?
What should be avoided to prevent feedback while recording?
What is the default tempo setting in Pro Tools?
What is the default tempo setting in Pro Tools?
When the Conductor Track button is enabled, only the manual tempo set in the Tempo field will be used.
When the Conductor Track button is enabled, only the manual tempo set in the Tempo field will be used.
What does the Conductor Track button indicate when it is blue?
What does the Conductor Track button indicate when it is blue?
To set a single tempo when the Conductor Track is disabled, type the desired value and press the __________ key.
To set a single tempo when the Conductor Track is disabled, type the desired value and press the __________ key.
Match the following tempo change methods to their descriptions:
Match the following tempo change methods to their descriptions:
How can you activate the Conductor Track?
How can you activate the Conductor Track?
The Meter Change dialog box allows you to set both the location and value of the meter.
The Meter Change dialog box allows you to set both the location and value of the meter.
What is a common meter used in many songs played on the radio?
What is a common meter used in many songs played on the radio?
To change the meter in Pro Tools, double-click the meter value in the ________ section.
To change the meter in Pro Tools, double-click the meter value in the ________ section.
Match the following terms with their definitions:
Match the following terms with their definitions:
What happens when you tap tempo with the Conductor Track disabled?
What happens when you tap tempo with the Conductor Track disabled?
It is common to change the meter at various points throughout a piece of music.
It is common to change the meter at various points throughout a piece of music.
What should you check to see the tempo and meter changes made in Pro Tools?
What should you check to see the tempo and meter changes made in Pro Tools?
The __________ change dialog box allows you to set specific tempo changes in your session's timeline.
The __________ change dialog box allows you to set specific tempo changes in your session's timeline.
What does the 'Track Record Enable' button do?
What does the 'Track Record Enable' button do?
The Disk Usage window displays the percentage of disk space used on each drive.
The Disk Usage window displays the percentage of disk space used on each drive.
What is a punch in point?
What is a punch in point?
Recording will stop when you click the ______ button.
Recording will stop when you click the ______ button.
Match the following actions with their corresponding descriptions:
Match the following actions with their corresponding descriptions:
Which shortcut will initiate recording immediately on a Windows computer?
Which shortcut will initiate recording immediately on a Windows computer?
A new clip will be created whenever recording stops.
A new clip will be created whenever recording stops.
What happens if recording is stopped before the end of a selected area?
What happens if recording is stopped before the end of a selected area?
You can make a selection during playback by pressing the ______ key for the start and the ______ key for the end.
You can make a selection during playback by pressing the ______ key for the start and the ______ key for the end.
What color range should recording levels aim for on the meter?
What color range should recording levels aim for on the meter?
The output settings in Pro Tools affect the audio recorded to your hard drive.
The output settings in Pro Tools affect the audio recorded to your hard drive.
Which of the following information is NOT displayed in the Disk Usage window?
Which of the following information is NOT displayed in the Disk Usage window?
What should you do if your recording signal is clipping?
What should you do if your recording signal is clipping?
Punch-in recording can be useful for correcting mistakes in a track.
Punch-in recording can be useful for correcting mistakes in a track.
In the _, you can adjust many of a track’s parameters through a single mixer-like interface.
In the _, you can adjust many of a track’s parameters through a single mixer-like interface.
What color denotes that a track is record-enabled?
What color denotes that a track is record-enabled?
You can drag the timeline selection icons to adjust the ______ of the selection.
You can drag the timeline selection icons to adjust the ______ of the selection.
Match the following tracks with their appropriate action:
Match the following tracks with their appropriate action:
What happens to the clip and file names when recording onto a track?
What happens to the clip and file names when recording onto a track?
What is a major benefit of using a DAW for recording compared to analog tape?
What is a major benefit of using a DAW for recording compared to analog tape?
Changing a track’s name will also change the names of the clips recorded on that track.
Changing a track’s name will also change the names of the clips recorded on that track.
What is the purpose of the Disk Usage window in Pro Tools?
What is the purpose of the Disk Usage window in Pro Tools?
Recording onto tracks with default names can lead to confusion because they are likely to have no clue as to what they _ .
Recording onto tracks with default names can lead to confusion because they are likely to have no clue as to what they _ .
How can you reset your volume to unity in the Output window?
How can you reset your volume to unity in the Output window?
Pan controls are only used when mixing audio, not during recording.
Pan controls are only used when mixing audio, not during recording.
What should be the initial adjustment for monitoring audio levels?
What should be the initial adjustment for monitoring audio levels?
When a track is recorded, the clip name will be based on the name of the track with an appended _ at the end.
When a track is recorded, the clip name will be based on the name of the track with an appended _ at the end.
Which setting does NOT affect the audio being recorded?
Which setting does NOT affect the audio being recorded?
What happens when you punch in while recording?
What happens when you punch in while recording?
QuickPunch mode allows recording and playback to occur simultaneously.
QuickPunch mode allows recording and playback to occur simultaneously.
What is the primary advantage of Loop Recording?
What is the primary advantage of Loop Recording?
In Loop Record mode, each take is saved as a separate ______.
In Loop Record mode, each take is saved as a separate ______.
Match the recording feature with its function:
Match the recording feature with its function:
What is the effect of stopping recording in the first half of the selected area during Loop Recording?
What is the effect of stopping recording in the first half of the selected area during Loop Recording?
One whole-file clip can be created from multiple subsets in Loop Recording.
One whole-file clip can be created from multiple subsets in Loop Recording.
What visual cue indicates a whole-file clip in the Clips List?
What visual cue indicates a whole-file clip in the Clips List?
To activate Loop Recording, one can choose Loop Record from the ______ menu.
To activate Loop Recording, one can choose Loop Record from the ______ menu.
Which of the following is true about subset clips?
Which of the following is true about subset clips?
Loop Recording is traditionally used in video production.
Loop Recording is traditionally used in video production.
What must you do to start recording in Loop Record mode once it is activated?
What must you do to start recording in Loop Record mode once it is activated?
The process of compiling the best parts of each take into a single performance is called ______.
The process of compiling the best parts of each take into a single performance is called ______.
Match the recording modes with their functions:
Match the recording modes with their functions:
What is the purpose of pre-roll in recording?
What is the purpose of pre-roll in recording?
Post-roll playback stops immediately after the selected area ends.
Post-roll playback stops immediately after the selected area ends.
What do you need to activate to set pre-roll and post-roll quickly?
What do you need to activate to set pre-roll and post-roll quickly?
The Pre-roll button will turn _____ when it is active.
The Pre-roll button will turn _____ when it is active.
Match the following recording concepts with their definitions:
Match the following recording concepts with their definitions:
How do you reset the pre-roll to zero while using the Selector tool?
How do you reset the pre-roll to zero while using the Selector tool?
You must type a new value in the Pre-roll field each time you want to change it.
You must type a new value in the Pre-roll field each time you want to change it.
What appears in the Record button when QuickPunch mode is active?
What appears in the Record button when QuickPunch mode is active?
You can activate QuickPunch by right-clicking the _____ button.
You can activate QuickPunch by right-clicking the _____ button.
Match the actions with their shortcuts:
Match the actions with their shortcuts:
What happens once the playback cursor reaches the end of the selected area?
What happens once the playback cursor reaches the end of the selected area?
The pre-roll and post-roll settings need to be manually typed in every time they are used.
The pre-roll and post-roll settings need to be manually typed in every time they are used.
What should you do to hear the session before the punch in?
What should you do to hear the session before the punch in?
To give the performer a sense of tempo during recording, you would use _____ time.
To give the performer a sense of tempo during recording, you would use _____ time.
Match the terms with their correct actions:
Match the terms with their correct actions:
Flashcards
Tempo
Tempo
The speed at which the beats in a piece of music are played; measured in beats per minute (BPM).
Click Track
Click Track
A pre-recorded track with a steady pulsing click sound, used to guide musicians in maintaining a consistent tempo.
Meter
Meter
The time signature of a piece of music indicates the number of beats in each measure and the type of note that receives one beat.
Pre-Session Checklist
Pre-Session Checklist
Signup and view all the flashcards
Microphone Signals
Microphone Signals
Signup and view all the flashcards
Line Level Signals
Line Level Signals
Signup and view all the flashcards
DI Box
DI Box
Signup and view all the flashcards
Digital Audio Formats
Digital Audio Formats
Signup and view all the flashcards
Default Pro Tools Tempo
Default Pro Tools Tempo
Signup and view all the flashcards
What does the Conductor Track do?
What does the Conductor Track do?
Signup and view all the flashcards
Disabled Conductor Track
Disabled Conductor Track
Signup and view all the flashcards
Enabled Conductor Track
Enabled Conductor Track
Signup and view all the flashcards
Tempo Ruler
Tempo Ruler
Signup and view all the flashcards
Tempo Field (Disabled Conductor Track)
Tempo Field (Disabled Conductor Track)
Signup and view all the flashcards
Tempo Change Dialog Box
Tempo Change Dialog Box
Signup and view all the flashcards
Tap Tempo Feature
Tap Tempo Feature
Signup and view all the flashcards
Meter or Time Signature
Meter or Time Signature
Signup and view all the flashcards
Default Pro Tools Meter
Default Pro Tools Meter
Signup and view all the flashcards
Meter Field (Disabled Conductor Track)
Meter Field (Disabled Conductor Track)
Signup and view all the flashcards
Meter Change Dialog Box
Meter Change Dialog Box
Signup and view all the flashcards
Meter Ruler
Meter Ruler
Signup and view all the flashcards
Tempo & Meter Rulers
Tempo & Meter Rulers
Signup and view all the flashcards
Track Input Monitor
Track Input Monitor
Signup and view all the flashcards
Input/Output (I/O) Setup
Input/Output (I/O) Setup
Signup and view all the flashcards
Countoff
Countoff
Signup and view all the flashcards
Click II
Click II
Signup and view all the flashcards
Beats per measure
Beats per measure
Signup and view all the flashcards
Only During Record
Only During Record
Signup and view all the flashcards
During Play and Record
During Play and Record
Signup and view all the flashcards
Click/Countoff Options
Click/Countoff Options
Signup and view all the flashcards
Monitoring
Monitoring
Signup and view all the flashcards
Direct Input (DI) signal
Direct Input (DI) signal
Signup and view all the flashcards
Direct Input (DI) Box
Direct Input (DI) Box
Signup and view all the flashcards
Disarming a Track
Disarming a Track
Signup and view all the flashcards
Disk Usage Window
Disk Usage Window
Signup and view all the flashcards
Size
Size
Signup and view all the flashcards
Avail
Avail
Signup and view all the flashcards
%
%
Signup and view all the flashcards
Track Min.
Track Min.
Signup and view all the flashcards
Record-enabling a Track
Record-enabling a Track
Signup and view all the flashcards
Punch In Point
Punch In Point
Signup and view all the flashcards
Punch Out Point
Punch Out Point
Signup and view all the flashcards
Punch-In Recording
Punch-In Recording
Signup and view all the flashcards
Making a Selection During Playback
Making a Selection During Playback
Signup and view all the flashcards
Adjusting Timeline Selections
Adjusting Timeline Selections
Signup and view all the flashcards
Moving Timeline Selection without Changing Duration
Moving Timeline Selection without Changing Duration
Signup and view all the flashcards
Recording Selections
Recording Selections
Signup and view all the flashcards
Recording Start Point
Recording Start Point
Signup and view all the flashcards
Initiating Recording
Initiating Recording
Signup and view all the flashcards
Pre-Roll
Pre-Roll
Signup and view all the flashcards
Post-Roll
Post-Roll
Signup and view all the flashcards
Pre/Post-Roll Workflow
Pre/Post-Roll Workflow
Signup and view all the flashcards
QuickPunch Recording
QuickPunch Recording
Signup and view all the flashcards
QuickPunch Button
QuickPunch Button
Signup and view all the flashcards
Punch In
Punch In
Signup and view all the flashcards
Punch Out
Punch Out
Signup and view all the flashcards
Timeline
Timeline
Signup and view all the flashcards
Selector Tool
Selector Tool
Signup and view all the flashcards
Link Timeline and Edit Selection
Link Timeline and Edit Selection
Signup and view all the flashcards
Record-Enable Tracks
Record-Enable Tracks
Signup and view all the flashcards
Playback
Playback
Signup and view all the flashcards
Beginning of Selection
Beginning of Selection
Signup and view all the flashcards
End of Selection
End of Selection
Signup and view all the flashcards
Recording Level
Recording Level
Signup and view all the flashcards
Monitoring Volume
Monitoring Volume
Signup and view all the flashcards
Panning
Panning
Signup and view all the flashcards
Edit Window
Edit Window
Signup and view all the flashcards
Output Window
Output Window
Signup and view all the flashcards
Naming Tracks
Naming Tracks
Signup and view all the flashcards
Clip Naming
Clip Naming
Signup and view all the flashcards
Disk Usage
Disk Usage
Signup and view all the flashcards
Sample Rate
Sample Rate
Signup and view all the flashcards
Bit Depth
Bit Depth
Signup and view all the flashcards
Recording Quality
Recording Quality
Signup and view all the flashcards
Mixing
Mixing
Signup and view all the flashcards
WAV File
WAV File
Signup and view all the flashcards
QuickPunch Mode
QuickPunch Mode
Signup and view all the flashcards
QuickPunch Subset Clips
QuickPunch Subset Clips
Signup and view all the flashcards
Loop Recording
Loop Recording
Signup and view all the flashcards
Loop Recording: Individual Takes
Loop Recording: Individual Takes
Signup and view all the flashcards
Loop Recording: Whole-File Clip
Loop Recording: Whole-File Clip
Signup and view all the flashcards
Whole-File Clips
Whole-File Clips
Signup and view all the flashcards
Subset Clips
Subset Clips
Signup and view all the flashcards
Clips List: Identifying Whole-File and Subset Clips
Clips List: Identifying Whole-File and Subset Clips
Signup and view all the flashcards
Loop Recording Selection
Loop Recording Selection
Signup and view all the flashcards
Loop Recording: Seamless Playback
Loop Recording: Seamless Playback
Signup and view all the flashcards
Loop Recording: Stopping in the First Half
Loop Recording: Stopping in the First Half
Signup and view all the flashcards
Loop Recording: Stopping in the Second Half
Loop Recording: Stopping in the Second Half
Signup and view all the flashcards
Loop Recording: Application in Music Production
Loop Recording: Application in Music Production
Signup and view all the flashcards
Loop Recording: Benefits of Multiple Takes
Loop Recording: Benefits of Multiple Takes
Signup and view all the flashcards
QuickPunch Mode: Trimmed Clip Boundaries
QuickPunch Mode: Trimmed Clip Boundaries
Signup and view all the flashcards
Study Notes
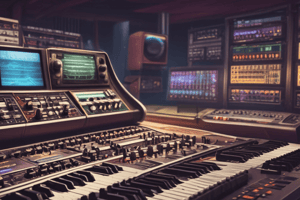
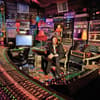
Recording Audio in Pro Tools
- Pro Tools facilitates quick and easy audio recording, a key differentiator in the audio industry.
- This lesson covers setting tempo and meter, track preparation, and basic recording.
Setting Tempo and Meter
- Tempo: The speed of beats, measured in Beats Per Minute (BPM). Pro Tools defaults to 120 BPM but can be customized.
- Conductor Track: This button, located in the MIDI controls of the Edit or Transport window, dictates how tempo is handled:
- Disabled (grey): Session operates in Manual Tempo mode, solely relying on the Tempo value in the MIDI controls. Tempo ruler values are ignored.
- Enabled (blue): Session utilizes tempo changes specified in the Tempo ruler, allowing for dynamically changing tempos throughout the session.
- Setting Tempo (Conductor Track Disabled):
- Click the Tempo field in the MIDI controls.
- Type the desired BPM and press Return (Mac) or Enter (Windows).
- Setting Tempo (Conductor Track Enabled):
- Click the "+" button next to "Tempo" in the Rulers area.
- Specify the start location (bar, beat, tick) and desired BPM in the Tempo Change dialog box and click OK.
- Tap Tempo: Enable Pro Tools to automatically calculate tempo by highlighting the tempo field and pressing the "T" key while tapping.
- Meter (Time Signature): Defines the number of beats in a measure and the note value per beat. (e.g., 4/4 time has four beats per measure and a quarter note gets one beat). Pro Tools defaults to 4/4.
- Setting Meter:
- Double-click the Meter value in the MIDI controls or click the "+" button next to "Meter" in the Rulers area.
- Specify the location (bar, beat, tick) of the meter change in the Meter Change dialog. Set the desired meter, click value (e.g., quarter note), and check the "Snap To Bar" box (generally recommended).
- Tempo and Meter Rulers: These visual aids display the current tempo and meter values, along with any changes applied within the session.
Setting Up a Click Track
- Click Track: A track with a steady click sound to indicate the tempo, used in many music recording sessions.
- Creating a Click Track: Choose "Create Click Track" from the Track menu. It is an Auxiliary Input Track with the Click II plug-in to signify the tempo.
- Click/Countoff Options: Configure the click's behavior:
- During Play and Record: Displays click track during playback and recording.
- Only During Record: Click track is silent during playback but activates during recording.
- Only During Countoff: Click track activates during a predetermined count-off before each recording section.
- Countoff: The number of counts before recording starts. Values are set in the Countoff area of the Click/Countoff Options dialog box.
- Activating the Metronome: Choose from Options menu - click, or click the Metronome button.
Preparing Tracks for Recording
- Input Path Selector: Select the audio source input for each track. Different inputs are essential for recording individual sonic elements on different tracks.
- Output Path Selector: Choose the monitor connection path for your session.
- TrackInput Monitor: This feature enables monitoring the level of the incoming signal on the track. Allows for level adjustment, ensuring the signal level is strong but not clipping (avoiding overloads).
- Default Inputs and Outputs: For avoiding issues: Go to Setup > I/O > Input tab, Output tab, and Bus tab - clicking "Default" button.
- Monitor Levels: Adjust volume faders and pan values in the Mix or Edit window for monitoring but not affecting the recorded audio.
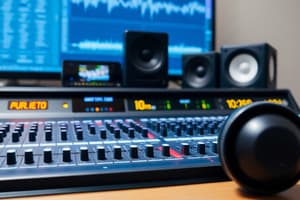
- Output Window: Accessible from both Edit and Mix windows, this provides a mixer-like interface for output control. Utilize the Option/Alt key to reset pan/volume to unity/center.
Track Names
- Crucial step: Descriptive track names are essential for future organization and clarity (e.g., instead of "Audio 1", name it "Lead Vocal").
- Track names determine clip naming in both audio and MIDI recordings.
- Clip naming follows the track name format (e.g. "Lead Vocal_01").
- Track name changes after recording don't alter the already recorded clips names.
Management of Disk Usage
- Disk Usage Window: Provides information on available space on connected drives and is crucial for avoiding running out of disk space during a recording session.
Basic Recording
- Track Record Enable button: Arm tracks for recording. Recording starts at the playback cursor's position or a specified selection.
- Record Button: Initiates the recording process.
- Recording Shortcuts: Use Command+Spacebar (Mac), Ctrl+Spacebar (Windows), or F12, or the keypad 3 key to initiate recording.
- Recording Selections: Allows targeted re-recording of specific sections of audio, preventing overwriting of entire tracks.
- Punch-in Recording: Recording a defined portion using selections.
- Making Selections During Playback: Uses arrow keys to create punch-in/out selections.
- Adjusting Selections: Adjust the start, end, or duration of selections. Hold Option/Alt key for combined manipulations.
Pre-Roll and Post-Roll
- Pre-Roll: Time for playback before the recording selection, allowing the musician to hear the session's context before performing.
- Post-Roll: Time for playback after the recording selection.
- Setting Pre/Post-Roll in the Transport Window: Enter the desired pre/post-roll times in the designated fields. Drag the flags on the timeline to adjust, and activate/deactivate by clicking respective buttons/menu selections.
- New Workflow (Link Timeline and Edit Selection Enabled): Select the area, click with Option/Alt in Edit window at desired pre-roll/post-roll location to activate flags. For resetting, click within selection.
QuickPunch Recording
- QuickPunch Mode: Allows multiple punch-in/out points within a single recording session.
- Record Button changes: Records in continuous playback but creates distinct clips for each punch-in/out.
- Adjustments to take recordings within a single playback and recording pass.
Loop Recording
- Loop Mode: An optional recording method, repeating the selected section. Ideal for musical segments that require repeated performances and/or editing.
- Whole-file vs. subset-clips: Understanding these clip types (whole-file clips are in bold in the Clip List while subset clips in non-bold font) is crucial for media management.
- Individual takes are denoted as subset clips while the entire recording is designated as the whole file clip (parent clip).
- Loop recording results in multiple subset clips of the recording selection in addition to a combined whole-file clip that represents the entire recording.
After Recording
Disarm (disable recording) tracks and make sure the Record button is not highlighted. Then, playback your recording.
Studying That Suits You
Use AI to generate personalized quizzes and flashcards to suit your learning preferences.