Podcast
Questions and Answers
What is the recommended overlap and camera tilt for exterior acquisition?
What is the recommended overlap and camera tilt for exterior acquisition?
- 75/75 overlap and 70° camera tilt (correct)
- 50/50 overlap and 60° camera tilt
- 80/80 overlap and 75° camera tilt
- 90/90 overlap and 80° camera tilt
What is the primary purpose of the Point of Interest mode?
What is the primary purpose of the Point of Interest mode?
- To create a 3D model of the subject
- To conduct a site survey
- To capture a panoramic view of the surrounding area
- To capture detailed images of a specific subject (correct)
Why is it important to review images after acquisition?
Why is it important to review images after acquisition?
- To ensure they are aesthetically pleasing
- To check for blurry, overexposed, or misdirected images (correct)
- To immediately upload images to the cloud
- To classify images by category
What is the recommended practice when updating drone firmware or applications?
What is the recommended practice when updating drone firmware or applications?
What is the purpose of setting the processing area in Drone Deploy?
What is the purpose of setting the processing area in Drone Deploy?
What is the purpose of creating multiple starting points in Matterport?
What is the purpose of creating multiple starting points in Matterport?
What can clients do with the link provided to the 3D model on Sketchfab?
What can clients do with the link provided to the 3D model on Sketchfab?
What is the purpose of editing the point cloud in a 3D model?
What is the purpose of editing the point cloud in a 3D model?
What is the result of enabling auto-start turntable animation in a 3D model?
What is the result of enabling auto-start turntable animation in a 3D model?
What is the final step in the 3D modeling process?
What is the final step in the 3D modeling process?
Flashcards are hidden until you start studying
Study Notes
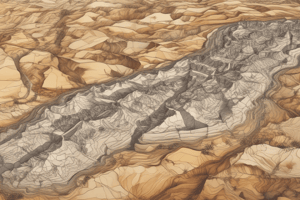
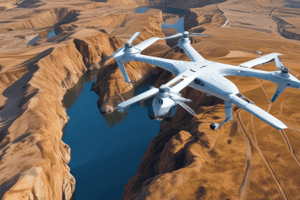
Drone Mapping Acquisition
- Before flying, ensure you have a Part 107 certificate, registration, and insurance
- Use a double grid pattern for exterior acquisition, and set your settings in advanced mode
- Set a 75/75 overlap with a 70° camera tilt, and fly at an altitude of 150-200 ft
Point of Interest Mode
- Use DJI Go4 and set up a point of interest mode to create three circles around the subject
- Set a 15 ft deviation and elevation between each flight run
- Tilt the camera down to eliminate sky from the images
- Limit deviation between tilt angles to prevent issues
Acquisition Considerations
- Be aware of firmware compatibility issues with older drones and newer applications
- Use caution when updating firmware or apps to avoid causing problems
- Consider using different acquisition applications if needed
Data Review and Upload
- Review images to ensure they are not blurry, overexposed, or pointing in the wrong direction
- Use the Drone Deploy app to direct upload from the app while connected to the drone (optional)
- Check and back up data after each mission to ensure quality and prevent issues
Creating a Project in Drone Deploy
- Create a new project and set up the project area carefully, as this is a critical part of the workflow
- Set the processing area to focus on the area around the building, excluding unnecessary photos
- Adjust the processing area to include required photos, if needed
Pre-Flight Preparations
- Ensure possession of a Part 107 certificate, registration, and insurance before flying
- Set up drone in advanced mode with a double grid pattern for exterior acquisition
Flight Settings
- Maintain a 75/75 overlap with a 70° camera tilt during flight
- Fly at an altitude of 150-200 ft to capture optimal images
Point of Interest Mode
- Use DJI Go4 to create three circles around the subject in point of interest mode
- Set a 15 ft deviation and elevation between each flight run for comprehensive coverage
- Tilt the camera down to eliminate sky from the images and limit deviation between tilt angles
Drone Compatibility and Maintenance
- Be aware of firmware compatibility issues with older drones and newer applications
- Exercise caution when updating firmware or apps to avoid causing problems
- Consider using alternative acquisition applications if necessary
Data Quality Control
- Review images to ensure they are not blurry, overexposed, or pointing in the wrong direction
- Directly upload images to the Drone Deploy app from the drone (optional)
- Check and back up data after each mission to ensure quality and prevent issues
Setting Up a Drone Deploy Project
- Create a new project and carefully set up the project area to focus on the critical parts of the workflow
- Set the processing area to focus on the area around the building, excluding unnecessary photos
- Adjust the processing area to include required photos, if needed
Uploading and Annotating 3D Models
- Uploading 3D textured mesh to SketchFab allows for easy navigation, embedding, and real-time spinning/animation of the model.
- SketchFab offers advanced controls for lighting, grain, sharpness, and annotations, with no size limitations.
Annotating SketchFab Models
- Annotations in SketchFab enable adding clickable buttons to the model, linking to other models, websites, or virtual tours.
- Annotations connect exterior and interior models, allowing users to jump between them.
- Editing 3D settings, adding a starting view, and setting rotation/camera orientation controls the user's experience.
Creating Matter Tags in Matterport
- Create a starting area in Matterport, which is the first area users see when entering the building.
- Add matter tags to jump from interior models to exterior models or external websites.
- Use link shorteners to track users jumping from interior to exterior models.
Product Tags and Virtual Storefronts
- Add product tags in Matterport to sell products directly from virtual stores.
- Create virtual storefronts by adding product tags and links to external websites.
- Use matter tags to create a mini landing pad for products and link to external websites.
Publishing and Sharing Models
- Brand and unbrand links in Matterport to share models with Realtors and clients.
- Use unbranded links when sharing with Realtors to avoid regulatory issues with MLS.
- Share iframe links from SketchFab with clients to embed the model on their website.
- Share branded links for Zillow to view exterior models and go to the realtor's website.
Hotkeys and Multiple Starting Points
- Use hotkeys in Matterport to create multiple starting points and share links on SketchFab.
- Create multiple starting points in Matterport to allow users to enter homes from different locations.
3D Modeling and Teleportation Devices
- Remember saved views, but start locations are not automatically saved.
- Corner shots must be set manually to save correct starting locations.
Sharing 3D Models with Clients
- Share 3D models with clients using links on SketchFab.
- Clients can embed the model on their website using the provided link.
- Auto-start turntable animation can be enabled to make the model more interactive.
Embedding 3D Models
- Embedding models allows real-time viewing on webpages.
- Be cautious not to overload the GPU with too many models, causing them to shut down.
- Edit point clouds to change things like hiding/showing objects (e.g., cars).
Editing and Teleportation
- Use pre-select annotation to allow people to teleport inside the model.
- Editing point clouds allows for changes to the model and teleportation capabilities.
Deliverables for Clients
- Provide clients with links to the 3D model on SketchFab.
- Give clients the embed code to add the model to their website.
Recap of 3D Modeling Process
- Acquire imagery inside a building using a 360 camera and Matterport software.
- Create a 3D textured mesh of the exterior using Drone Deploy and a formulaic image acquisition strategy.
- Post-process the outside and inside models.
- Host models online and link them together.
- Provide deliverables to clients (links and embed codes).
Studying That Suits You
Use AI to generate personalized quizzes and flashcards to suit your learning preferences.