Podcast
Questions and Answers
What is the primary purpose of the 'Noise Reduction' effect in Audacity?
What is the primary purpose of the 'Noise Reduction' effect in Audacity?
- To attenuate sounds below a certain threshold.
- To reduce constant background noise such as hums and hisses. (correct)
- To completely eliminate all types of background noise.
- To remove specific frequencies which may be causing noise.
What is the first step required to use the Noise Reduction effect in Audacity?
What is the first step required to use the Noise Reduction effect in Audacity?
- Select all of the audio you want to clean.
- Press Ctrl+R or Cmd+R to reduce noise.
- Adjust the Noise Reduction parameters to your preference.
- Capture a noise profile from a section of background noise. (correct)
When tuning the settings of the Noise Reduction effect, what is the purpose of the 'Residue' toggle?
When tuning the settings of the Noise Reduction effect, what is the purpose of the 'Residue' toggle?
- To increase the sensitivity of the noise reduction filter.
- To reverse the noise reduction, returning the audio to its original state.
- To set the noise profile for a selected audio.
- To isolate exactly what part of the audio will be removed. (correct)
What could potentially cause artifacts (random short bursts of tones) when using the Noise Reduction effect?
What could potentially cause artifacts (random short bursts of tones) when using the Noise Reduction effect?
What is the purpose of the 'Noise Gate' effect?
What is the purpose of the 'Noise Gate' effect?
What is the recommended first step when applying the 'Noise Gate' effect in Audacity?
What is the recommended first step when applying the 'Noise Gate' effect in Audacity?
What is the most effective workflow when combining the Noise Reduction and Noise Gate?
What is the most effective workflow when combining the Noise Reduction and Noise Gate?
What does the Q-value parameter control within the 'Notch Filter' effect in Audacity?
What does the Q-value parameter control within the 'Notch Filter' effect in Audacity?
Flashcards
Audacity Noise Reduction
Audacity Noise Reduction
Audacity's Noise Reduction effect reduces constant background noise like fan hiss or fridge hum. Helps reduce noise in recording.
Noise Profile Creation
Noise Profile Creation
Select a section of only background noise before using the effect. This lets Audacity identify and target only that specific noise.
Applying Noise Reduction
Applying Noise Reduction
After applying noise reduction, select the audio you want to clean and repeat the noise reduction process with the previously saved noise profile.
Noise Gate
Noise Gate
Signup and view all the flashcards
Using Noise Gate
Using Noise Gate
Signup and view all the flashcards
Notch Filter
Notch Filter
Signup and view all the flashcards
Notch Filter Q-value
Notch Filter Q-value
Signup and view all the flashcards
Noise Gate & Noise Reduction Order
Noise Gate & Noise Reduction Order
Signup and view all the flashcards
Study Notes
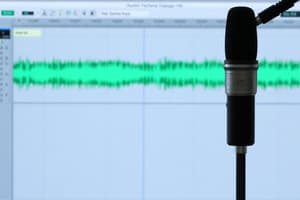
Audio Cleanup in Audacity
- Audacity offers tools for removing background noise. Best practice is to minimize noise at recording.
Noise Reduction
- Works best for constant noise sources (e.g., fans, hums, whines).
- Locate a section of background noise (a few seconds).
- Select it, then go to Effects > Noise Reduction, and press "Get noise profile."
- Select all audio for noise reduction, then Effects > Noise Reduction again.
- Adjust settings, using the "Residue" toggle to preview removed sound.
- Click OK to apply after satisfying with result. If using Residue before, switch to Reduce before applying.
- Improper sensitivity or inappropriate noise profile can cause artifacts (short tones).
- Shortcut Ctrl+R/Cmd+R for immediate application if settings not needed.
Noise Gate
- Attenuates sounds below a threshold, leaving louder sounds unaffected.
- Select a background noise section, then analyze the noise level (using the Select Function: Analyse Noise Level).
- Audacity recommends a threshold.
- Select audio to apply the gate, navigate to Effects > Noise Gate, set Select Function: Gate, enter threshold level.
- Fine-tune other parameters as desired.
- Click OK to apply.
- Apply Noise Gate after Noise Reduction for potentially better results with less aggressive Noise Reduction.
Notch Filter
- Removes hum or whistles at specific frequencies.
- Access Effects > Notch Filter.
- Enter desired frequency and Q-value (impact on surrounding frequencies, higher values impact fewer frequencies).
- Click OK to apply.
- Mains hum is 60Hz in North/Central America, and 50Hz elsewhere.
- Use Analyze > Plot Spectrum to identify offending frequencies.
- Harmonics (multiples of the main frequency) might need additional notch filter applications.
Studying That Suits You
Use AI to generate personalized quizzes and flashcards to suit your learning preferences.