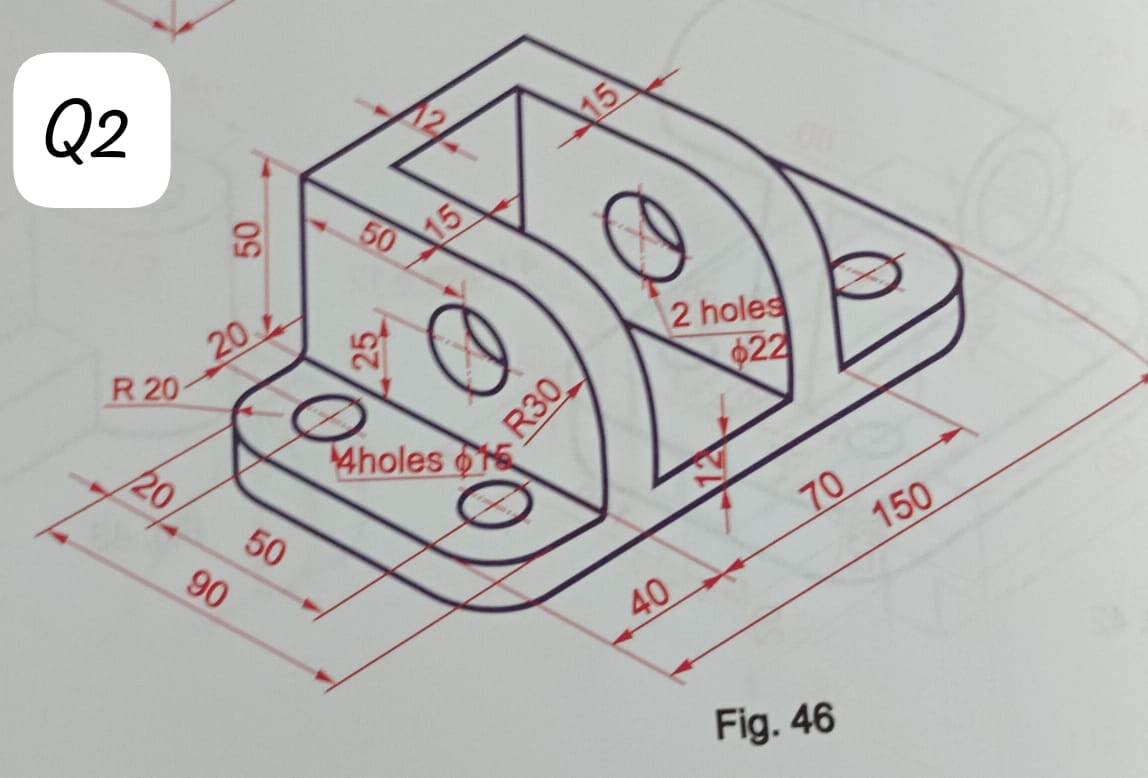
What does the engineering drawing show, and can you explain its features?

Understand the Problem
The question is presenting an engineering drawing with various dimensions and features. It appears to be asking for an understanding or analysis of the drawing, possibly to identify components, dimensions, or specifications.
Answer
It’s a bracket drawing showing multiple holes, dimensions, and radii in isometric view.
The drawing shows a bracket with multiple features: dimensions in millimeters, four holes of diameter 15 mm and two holes of diameter 22 mm, and specific distances between features. Radii of 20 and 30 mm are included. It's an isometric view facilitating a 3D understanding.
Answer for screen readers
The drawing shows a bracket with multiple features: dimensions in millimeters, four holes of diameter 15 mm and two holes of diameter 22 mm, and specific distances between features. Radii of 20 and 30 mm are included. It's an isometric view facilitating a 3D understanding.
More Information
Engineering drawings use isometric views to provide a comprehensive perspective that combines multiple views into one. This makes understanding all dimensions easier without flipping between different views. Notational marks like Ø signify hole diameters.
Tips
A common mistake is misreading the hole diameters or mixing up radii with diameters. Ensure to check the symbols used (e.g., Ø for diameter).
Sources
AI-generated content may contain errors. Please verify critical information