Podcast
Questions and Answers
What is the primary purpose of tramming the vertical milling machine head?
What is the primary purpose of tramming the vertical milling machine head?
To produce perpendicular machined surfaces when milling and to ensure that machined holes are perpendicular to the table.
What should be removed from the machine table to make tramming easier?
What should be removed from the machine table to make tramming easier?
Workholding devices
What is the purpose of using a solid square in the tramming process?
What is the purpose of using a solid square in the tramming process?
To align the quill with the square, ensuring it is perpendicular to the table.
What is the purpose of preloading the dial test indicator in the tramming process?
What is the purpose of preloading the dial test indicator in the tramming process?
What is the significance of positioning the spindle in neutral when using the dial test indicator?
What is the significance of positioning the spindle in neutral when using the dial test indicator?
What is the primary concern when crossing the T-slots with the spindle?
What is the primary concern when crossing the T-slots with the spindle?
What are the two alternative methods to avoid damaging the indicator when crossing the T-slots?
What are the two alternative methods to avoid damaging the indicator when crossing the T-slots?
What should be done to avoid introducing backlash when adjusting the head?
What should be done to avoid introducing backlash when adjusting the head?
What is the purpose of repeating the adjustment process at different positions (6 o'clock, 12 o'clock, 3 o'clock, and 9 o'clock)?
What is the purpose of repeating the adjustment process at different positions (6 o'clock, 12 o'clock, 3 o'clock, and 9 o'clock)?
What should be done after adjusting the head to ensure that the total indicator reading (TIR) is within tolerance?
What should be done after adjusting the head to ensure that the total indicator reading (TIR) is within tolerance?
Study Notes
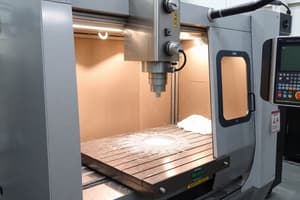
Tramming the Vertical Milling Machine Head
- Tramming is the process of adjusting the head to ensure the spindle is perpendicular to the machine table's top surface.
- This is necessary to produce perpendicular machined surfaces when milling and to ensure machined holes are perpendicular to the table.
Preparing for Tramming
- Remove any workholding devices from the machine table to make tramming easier.
- Loosen both sets of clamping bolts and turn the adjusting screws to align each reference mark with its "0" on each protractor.
Initial Alignment
- Snug the clamping bolts just beyond finger-tight with a wrench.
- Move the quill to its lowest position and lock it in place using the quill lock.
- Place the beam of a solid square on the table and slide the blade against one side of the quill, ensuring the table and square are free of dirt and burrs.
- Use the adjusting screw to more closely align the quill with the square, repeating the process side to side and front to back on the quill.
Fine-Tuning Alignment
- Snug the clamping screws so that the head is not loose, but can still be easily moved when turning the adjusting screws.
- Position the table so that the spindle is in the middle of the table.
- Mount a dial test indicator in the spindle and position it to sweep a circle slightly smaller than the width of the table.
- Rotate the spindle to the front of the table at the 6 o'clock position and bring the indicator contact tip against the table, preloading it so the needle travels about one-fourth of a turn of the dial.
Checking Alignment
- Rotate the spindle 180 degrees to bring the indicator to the back of the table at the 12 o'clock position.
- Note the reading and adjust the head until both positions show readings within about 0.001 to 0.002 inches of each other.
- Repeat this process at the 3 o'clock and 9 o'clock positions, adjusting the head until these two indicator readings are within 0.001 to 0.002 inches of each other.
- Return to the 6 o'clock and 12 o'clock positions and adjust the head until these two indicator readings are within 0.001 to 0.002 inches of each other.
Alternative Methods
- Use a gage block, 1-2-3 block, or similar block to check indicator readings at each position instead of bringing the indicator into direct contact with the table.
- Sweep the indicator on a precision-ground flat disc, plate, or the base of a swivel vise, instead of directly on the table.
Studying That Suits You
Use AI to generate personalized quizzes and flashcards to suit your learning preferences.
Description
Learn about the process of tramming, which involves adjusting the milling machine head to ensure perpendicular surfaces and holes.