Podcast
Questions and Answers
Which of the following best describes the function of SATA power cables in a computer system?
Which of the following best describes the function of SATA power cables in a computer system?
- They connect the CPU to the motherboard.
- They provide electrical power from the PSU to hard drives and optical drives. (correct)
- They transmit data between storage devices and the motherboard.
- They provide power to the RAM modules.
Where is the CMOS battery typically located within a computer system, and what is its general appearance?
Where is the CMOS battery typically located within a computer system, and what is its general appearance?
- On the video card; a flat, square battery.
- On the front panel; rectangular and black.
- Inside the PSU; a large, cylindrical battery.
- On the motherboard; a small, silver coin cell battery. (correct)
During reassembly of a computer, what is the recommended method for installing RAM modules?
During reassembly of a computer, what is the recommended method for installing RAM modules?
- Secure the RAM with screws to the motherboard.
- Push the RAM firmly until the clips on the sides snap into place. (correct)
- Use excessive force to ensure a tight fit.
- Apply thermal paste to the RAM chips before inserting them.
When reinstalling a video card, what indicates that it is properly seated in its slot?
When reinstalling a video card, what indicates that it is properly seated in its slot?
What is the correct procedure for securing hard drives and optical drives inside the computer case during reassembly?
What is the correct procedure for securing hard drives and optical drives inside the computer case during reassembly?
What is a critical final check to perform after reassembling a computer, before closing the case?
What is a critical final check to perform after reassembling a computer, before closing the case?
When disconnecting a monitor cable, which types typically require unscrewing?
When disconnecting a monitor cable, which types typically require unscrewing?
After visually inspecting the reassembled computer, including all cable connections, and before booting up, what important step should you take?
After visually inspecting the reassembled computer, including all cable connections, and before booting up, what important step should you take?
When removing an optical drive, what is a potential consequence of pulling on cables too forcefully?
When removing an optical drive, what is a potential consequence of pulling on cables too forcefully?
Before sliding out the optical drive, what crucial step must not be overlooked to prevent damage?
Before sliding out the optical drive, what crucial step must not be overlooked to prevent damage?
During the reinstallation of an optical drive, what is the correct order for reconnecting cables?
During the reinstallation of an optical drive, what is the correct order for reconnecting cables?
After connecting both the SATA power and data cables to the optical drive, what action should be taken to ensure proper functionality?
After connecting both the SATA power and data cables to the optical drive, what action should be taken to ensure proper functionality?
When securing the optical drive in the case, which step is essential regardless of whether screws or tool-less brackets are used?
When securing the optical drive in the case, which step is essential regardless of whether screws or tool-less brackets are used?
A user is having trouble sliding the optical drive into the bay. What is the MOST likely cause?
A user is having trouble sliding the optical drive into the bay. What is the MOST likely cause?
When preparing to unscrew the optical drive for removal, why might it be necessary to remove both side panels of the computer case?
When preparing to unscrew the optical drive for removal, why might it be necessary to remove both side panels of the computer case?
During reinstallation, you insert the optical drive, secure it, and connect the SATA cables. However, the drive is not recognized by the computer. What is the FIRST step you should take to troubleshoot the issue?
During reinstallation, you insert the optical drive, secure it, and connect the SATA cables. However, the drive is not recognized by the computer. What is the FIRST step you should take to troubleshoot the issue?
Which of the following is the correct first step when removing a SATA hard drive from a computer?
Which of the following is the correct first step when removing a SATA hard drive from a computer?
What should you do if a SATA cable is difficult to remove from the hard drive?
What should you do if a SATA cable is difficult to remove from the hard drive?
Why is it important to ensure the hard drive is firmly attached to its bracket after re-installation?
Why is it important to ensure the hard drive is firmly attached to its bracket after re-installation?
What is the primary difference between a SATA power cable and a SATA data cable?
What is the primary difference between a SATA power cable and a SATA data cable?
Which of the following best describes the shape of the SATA connectors that need to be aligned during reconnection?
Which of the following best describes the shape of the SATA connectors that need to be aligned during reconnection?
After reconnecting the SATA data and power cables, what indicates that the connection is properly established?
After reconnecting the SATA data and power cables, what indicates that the connection is properly established?
During reinstallation, if the hard drive does not sit flush against the bracket, what could be the potential cause?
During reinstallation, if the hard drive does not sit flush against the bracket, what could be the potential cause?
In what order should you reconnect the cables to a hard drive during reinstallation?
In what order should you reconnect the cables to a hard drive during reinstallation?
Flashcards
SATA Power Cables
SATA Power Cables
Wider connectors from PSU to hard drives & optical drives.
SATA Data Cables
SATA Data Cables
Narrower connectors from storage devices to motherboard.
CMOS Battery
CMOS Battery
Small silver coin cell battery located on the motherboard.
Reassembly Tip
Reassembly Tip
Signup and view all the flashcards
Secure Connections
Secure Connections
Signup and view all the flashcards
RAM Installation
RAM Installation
Signup and view all the flashcards
Video Card Setup
Video Card Setup
Signup and view all the flashcards
Monitor Cable Connection
Monitor Cable Connection
Signup and view all the flashcards
Unscrewing the Optical Drive
Unscrewing the Optical Drive
Signup and view all the flashcards
Removing the Optical Drive
Removing the Optical Drive
Signup and view all the flashcards
Common Mistakes
Common Mistakes
Signup and view all the flashcards
Inserting the Optical Drive
Inserting the Optical Drive
Signup and view all the flashcards
Securing the Drive
Securing the Drive
Signup and view all the flashcards
Closing the Case
Closing the Case
Signup and view all the flashcards
No Tray
No Tray
Signup and view all the flashcards
Disconnecting Cables
Disconnecting Cables
Signup and view all the flashcards
Finding Screws
Finding Screws
Signup and view all the flashcards
Reconnect SATA Data Cable
Reconnect SATA Data Cable
Signup and view all the flashcards
Reconnect SATA Power Cable
Reconnect SATA Power Cable
Signup and view all the flashcards
Study Notes
PC Hardware Exam Guide
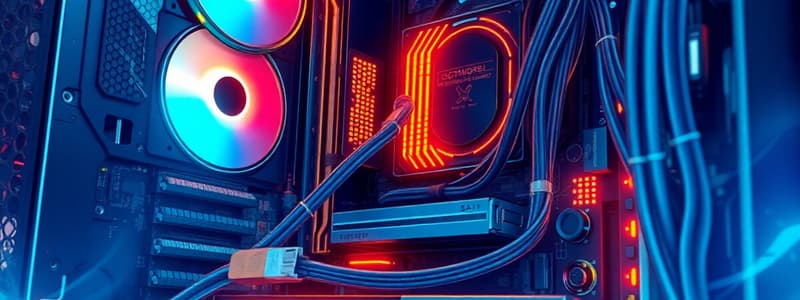
- SATA Cable: A cable characterized by a wide, black connector. It's designed for a specific connection direction; the L-shape prevents incorrect connections
- CPU and SATA Data Cables: CPUs do not have SATA data cables connected to them. SATA data cables are exclusively for storage devices like hard drives and optical drives.
- Drive Bays: PC cases have different sized bays for various storage devices. Common types are 5.25" and 3.5" drive bays.
- Powering Down: Before working on a PC, shut down the system, turn off the power supply, and disconnect external cables (USB, headphones, monitor, etc.).
- Grounding: Use an anti-static wrist strap to prevent static electricity from damaging components.
- Hard Drive (HDD/SSD) Identification: Rectangular metal boxes typically 2.5" or 3.5" in size. Less rectangular than optical drives. Located in a bay, often near the back of the computer case. No sliding trays.
- Hard Drive Connections: Two cables connect to a hard drive. A SATA power cable (thicker, multicolor wires) connects to the PSU, and a SATA data cable (narrower, "L" shaped) connects it to the motherboard.
- Hard Drive Removal Steps: Disconnect the power and data cables. Locate the screws holding the drive in place. Unscrew or release the drive from its bracket. Carefully remove the drive.
- Optical Drive Identification: A wider, rectangular box, typically with a front-facing disc tray to insert discs. Larger and more square-shaped than hard drives, often occupying a 5.25" bay. Similar SATA power/data cable connections as hard drives.
- Optical Drive Removal Steps: Disconnect the SATA power and data cables. Locate the screws or release mechanism (some cases have tool-less brackets). Gently remove the drive.
- RAM Identification: RAM sticks are inserted into long parallel slots on the motherboard. A notch on the bottom prevents incorrect placement.
- RAM Removal Steps: Carefully press down on the plastic clips at either end of the RAM slot to open them. Lift the RAM straight up and out of the slot.
- Video Card Identification: A large, rectangular card with a fan(s) and heat sink, usually occupying multiple slots on the back of the case. Typically equipped with multiple connectors such as HDMI or DisplayPort.
- Video Card Placement: Placed in the PCIe slot near the bottom half of the computer case.
- Video Card Removal Steps: Disconnect any power cables from the video card. Locate and unscrew the brackets that secure the video card. Remove any retaining clips. Carefully slide the card out.
- CPU Location: Located under the heatsink/fan on the motherboard.
- PSU Location: A metal box with a fan and multiple cables, typically located at the bottom or top of the computer case.
- SATA Power/Data Location/Description: Wider, often L-shaped connectors from the PSU, and narrower L-shaped, connecting storage devices to the motherboard.
- CMOS Battery Location and Description: A small, silver coin cell battery. Located on the motherboard.
Troubleshooting and Reassembly
- Disconnecting Cables First: Always unplug cables before removing components to avoid damage.
- Force: Avoid forcing components; this could damage the hardware.
- Pictures: Take photos of the connections before removing parts to assist with reassembly.
- Original Locations: Put screws and other small items back in the original container.
- Cleanup: Use compressed air to remove dust from inside the computer case.
Specific Components Removal Notes
- Side Panel Screws: Screws are often located on the back of the side panel of the case, sometimes using thumb screws.
- Inside Case Components: Some hardware may have brackets requiring removal via screws.
Studying That Suits You
Use AI to generate personalized quizzes and flashcards to suit your learning preferences.