Podcast
Questions and Answers
Which of the following is the primary purpose of performing a restriction digest on the plasmid samples?
Which of the following is the primary purpose of performing a restriction digest on the plasmid samples?
- To linearize the plasmid DNA for easier transformation into cells.
- To amplify the plasmid DNA for downstream applications.
- To determine the concentration of the plasmids.
- To identify the plasmids based on the unique fragment patterns. (correct)
Why is it important to avoid air bubbles when loading DNA samples into the wells of an agarose gel?
Why is it important to avoid air bubbles when loading DNA samples into the wells of an agarose gel?
- Air bubbles interfere with the migration of DNA, leading to uneven bands. (correct)
- Air bubbles may cause the gel to melt.
- Air bubbles can cause the DNA to degrade.
- Air bubbles can change the pH of the buffer, affecting DNA migration.
During gel electrophoresis, at which point should you add SybrSafe® dye to visualize DNA fragments?
During gel electrophoresis, at which point should you add SybrSafe® dye to visualize DNA fragments?
- To the electrophoresis buffer in the chamber before running the gel.
- Directly to the DNA samples before loading them into the wells.
- To the agarose gel after it has cooled down before pouring it into the cast. (correct)
- After the electrophoresis is complete but before imaging the gel.
In the context of the experiment described, what is the purpose of including 'uncut' plasmid samples in the gel electrophoresis?
In the context of the experiment described, what is the purpose of including 'uncut' plasmid samples in the gel electrophoresis?
Why is it important to use a new pipette tip every time you pipette the enzyme when assembling the restriction digest reactions?
Why is it important to use a new pipette tip every time you pipette the enzyme when assembling the restriction digest reactions?
According to the provided text, what is the importance of troubleshooting when results don't match expectations in research?
According to the provided text, what is the importance of troubleshooting when results don't match expectations in research?
Select the appropriate action if bubbles are present in your DNA sample during quantification using a NanoDrop spectrophotometer
Select the appropriate action if bubbles are present in your DNA sample during quantification using a NanoDrop spectrophotometer
Why is it important to let the agarose gel cool down to around 60°C before adding SybrSafe DNA dye?
Why is it important to let the agarose gel cool down to around 60°C before adding SybrSafe DNA dye?
In the protocol for restriction digestion, what is the purpose of adding water to the reaction mixture?
In the protocol for restriction digestion, what is the purpose of adding water to the reaction mixture?
What is the purpose of using the first stop when using a micropipette?
What is the purpose of using the first stop when using a micropipette?
What is the role of the EF1alpha promoter in the plasmid used in this experiment?
What is the role of the EF1alpha promoter in the plasmid used in this experiment?
Before starting the experiment, what is the purpose of the lab orientation file and associated videos regarding pipetting techniques?
Before starting the experiment, what is the purpose of the lab orientation file and associated videos regarding pipetting techniques?
Why is it important to avoid over- or under-dialing when setting the volume on a micropipette?
Why is it important to avoid over- or under-dialing when setting the volume on a micropipette?
In the context of the experiment, what is meant by 'running the gel in parallel' when setting up multiple restriction digest reactions?
In the context of the experiment, what is meant by 'running the gel in parallel' when setting up multiple restriction digest reactions?
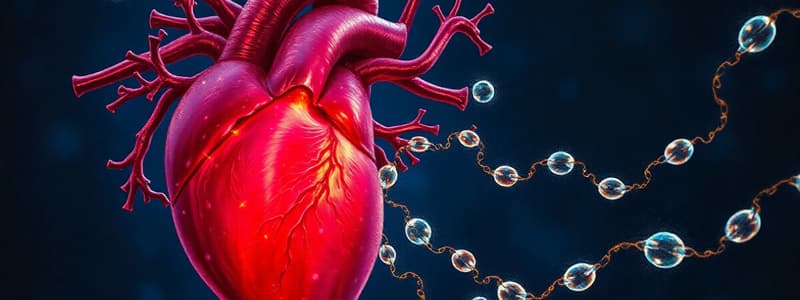
What is the purpose of the green fluorescent protein (GFP) in the myocardin expression plasmid?
What is the purpose of the green fluorescent protein (GFP) in the myocardin expression plasmid?
Flashcards
Exogenous DNA Construct
Exogenous DNA Construct
A technique used to alter gene expression by introducing exogenous DNA into cells via plasmids or viruses.
Plasmid
Plasmid
A circular DNA molecule used to carry and replicate specific genes in host cells.
Restriction Enzymes
Restriction Enzymes
Enzymes that cut DNA at specific recognition sequences. Used to digest DNA into fragments.
DNA Gel Electrophoresis
DNA Gel Electrophoresis
Signup and view all the flashcards
Micropipette
Micropipette
Signup and view all the flashcards
SybrSafe® DNA-binding dye
SybrSafe® DNA-binding dye
Signup and view all the flashcards
First stop
First stop
Signup and view all the flashcards
Second stop
Second stop
Signup and view all the flashcards
Nanodrop Lite spectrophotometer
Nanodrop Lite spectrophotometer
Signup and view all the flashcards
Absorbance Spectrum
Absorbance Spectrum
Signup and view all the flashcards
DNA Ladder
DNA Ladder
Signup and view all the flashcards
Running Buffer
Running Buffer
Signup and view all the flashcards
Mastermix
Mastermix
Signup and view all the flashcards
Uncut control
Uncut control
Signup and view all the flashcards
Study Notes
- The lab focuses on micropipetting, restriction digestions, and DNA gel electrophoresis.
- The fundamental approach to investigate gene function involves altering its expression, achieved by introducing an exogenous DNA construct, using a plasmid or virus, into cells or tissue of interest.
- The workflow of a cell physiologist will be performed to characterize how gene over-expression impacts cellular phenotype.
- Analysis will be carried out focusing on changes in cellular appearance, localization of intracellular proteins and structures, and mRNA levels.
- The exogenous gene being expressed is called myocardin.
- It makes of use of a plasmid that expresses myocardin under the control of an EF1alpha promoter, ensuring consistent expression over several days, in addition to green fluorescent protein (GFP).
- This allows for visually confirming which cells take up and express the exogenous genes, focusing on the plasmid.
- Plasmids expressing myocardin and another for a different project were acquired.
- The labels on the plasmid samples fell off during transport and must be distinguished experimentally using restriction enzyme cutting site patterns.
- This week's goal is to confirm the correct plasmid for use.
Lab work plan
- Orientation to the lab and equipment/materials, find you lab partner.
- Review of lab safety protocols - covering any accidents, spills, showers, eye wash, hand washing, falls, sharps etc.
- Practice with simulation skills relating to micropipetting at the bench.
- Determination of the concentration of purified plasmid will be performed.
- Digestion of a small amount of each plasmid sample into fragments.
- Separation and visualization of fragments to identify each plasmid.
- Work with your lab partner/bench-mates/teaching team.
- If data collected are not what you expect, it can be an opportunity to troubleshoot your work.
- Problem-solving in research is more important than achieving the "right answer" on the first attempt.
Safety Considerations
- Be prepared, ask questions, and don't rush.
- Handling of SybrSafe® DNA-binding dye requires gloves.
- Handle gels as directed.
Experimental Aims:
- Design a restriction digestion experiment for the confirmation of the myocardin expression plasmid, also known as pMYOCD-IRES-GFP, or pMYOCD for short.
Learning Objectives:
- Learn micropipetting techniques
- Perform restriction digests of plasmid DNA
- Prepare/run DNA agarose gel electrophoresis.
- Link band pattern to plasmid map.
- Record-keeping and documentation of lab work practices
Protocol notes
- First: record your partner/team contact information
- Before lab: lab orientation which includes "Pipetting & Micropipetting" and videos
- Practice solid comfort level with this central skill because Pipetting is often required
- When holding a micropipette: Hook the pipette over your index finger of your dominant hand.
- Feel the plunger and tip ejector.
- The first stop is the "accurate" location for drawing up liquid.
- The second stop is for fully dispensing liquid, but not for drawing liquid, inaccuracy.
- Attach pipette tip firmly by pressing the tip into the box.
- Eject the tip by pressing the ejector button.
Micropipetting volumes
- Know the highest and lowest maximum volumes for your pipette
- Practice feeling the stops at each maximum volume
- Choose the right pipette, and pipette water or food coloring into a surface.
- Pipette three separate spots, each of 1000uL.
- Pipette three separate spots, each of 100uL.
- Pipette three separate spots, each of 9uL and maintain consistent size
- With a P20 set to 2uL, aspirate 2uL and pipette it all completely into a spot.
- A mistake would be to push the plunger to the 2nd stop before drawing up liquid, then pipette all this liquid into a spot.
- Compare sizes of spots - which is actually 2uL?
Making a solution:
- Prepare your own tube: 7.5uL blue + 22.5uL red + 275 uL yellow
- Check the colour and compare with the instructor.
- Set the P1000 to 305 uL and aspirate sample and ensure no drops or bubbles.
- Troubleshoot differences in results
- The Nanodrop Lite spectrophotometer determines DNA concentration and purity using very small volumes and captures an absorbance spectrum.
- The line may be long so set the gel cassette while you wait.
Working with Nanodrop
- If the spec has already been blanked, then you don't need to re-blank.
- The Nanodrop should first be “blanked" with a sample of dilute TE to baseline DNA-free absorbance spectrum and wipe off with kimwipe
- Load 1uL of sample, flick DNA tube, and click “measure.”
- Record the DNA concentration output as well as the A260/A280 ratio.
- Getting errors? Troubleshoot pipetting onto pedestal, and avoid bubbles.
- Part C deals with restriction Digests - where there are 2 plasmid samples
- pMYOCD-IRES-GFP, pCDNA3.1-NEAT1 are visualized using restriction enzymes.
Planning the enzymes experiment and choosing enzymes
- The enzymes create a unique pattern of band sizes that allows which plasmid is tested.
- Decide what restriction enzymes will work.
- Chose a plasmid with a clearly different set of bands for each of the two plasmids.
- The restriction enzymes available this semester are Sall, EcoRI, Ndel, Ncol, Dpnl, BamHI and ClaI.
- Your lab notebook, should note two enzyme(s) to use, also note the rationale for your choice.
- Fragments that are too small (<100bp) or too big (>9kbp) are difficult to resolve on a gel.
- Large fragments (>9kbp) may be difficult to distinguish from uncut plasmid.
- Calculate predicted sizes of fragments that you expect to generate from all of your restriction digest reactions.
- Each plasmid, will perform “double digest" reactions ("single digest” reactions and no-enzyme reactions).
- Organize your predictions according to the reactions in your lab book.
- Choose enzymes in partnership, other choices are ok.
Plasmid maps
- Features to notice - pUC ORI" or "ori" origin duplication; ampR ampicillin-resistance gene RE cut-sites in italics.
Planning the Restriction Digest Reactions:
- Write reaction mixtures in an incomplete (a.k.a. empty) table in your lab book and leave enzyme names blank.
- Each reaction mixture should be a total 20uL volume.
- The volume consist of buffer (stock is 10X), restriction enzyme(s) (1uL each), plasmid (~1ug), and water.
- Prepare an un-cut (no enzyme) reaction, and one or more single-cut reactions as controls.
- The amounts of plasmid and water to be added can be calculated if you know that the plasmid DNA concentration is 375ng/uL.
- Lab setting up Restriction Digest Reactions - Decide on one shared plan and finalize your tables with your partner.
Reaction mixtures and procedure
- Label a sterile 0.5 mL tube for each reaction.
- Prior to the experiment, talk about which components you should add first vs. last in parallel.
- Assemble reaction components in parallel and avoid contamination and clean the tip every time to pipette the enzyme.
- Vortex and tap down the tubes collect sample in the bottom.
- Incubate the reactions at 37°C for 15 minutes.
- Start preparing the gel to load.
Gel electrophoresis - separation and visualization digest fragments.
- The goal is to determine which plasmid is which and involves sharing a gel with another group.
- Prepare gel casting tray as shown and tape ends.
- The comb is placed at 15-well and placed in the tray.
- Weigh out 0.4 g of agarose powder in a flask and mix.
- Add 40 mL of 1X TBE buffer and swirl.
- Place flask in microwave and heat and swirl.
- Use gloves when dealing with heated flask.
- Let it cool slightly by swirling the flask use folded paper towels.
- Add DNA dye and swirl gently and pour mixture into the gel and top off with pipette tip.
- Let it set to cool completely and work on the next page.
- Plan the other groups, and right down in your notebooks the arrangement including 1 ladder.
- Each log into cloud account make folder and subfolder for partners to avoid plagiarism.
Pipetting into the gel
- What does a gel and its well feel like?
- Holding a pipette tip place in well and bottom is known
- Loading sample in well.
- Plant stabilize bench hands.
- Gently place tip into well
- Pipette and dispense
- Mix the sample is dispersed completely
- Try to avoid bubbles, push sample and re-draw
- After loading, look at see how it loaded.
- Gel loaded should now make mistake on purpose to what cause.
Loading and Running the gel
- Submerge the gel and remove the casting tray and place and tray with gel in the electrophoresis chamber.
- Fill the electrophoresis chamber to cover the gel by 1-2 mm and remove the well comb.
- Load ladder with the invitrogen
- Load 10micro litres to choose for ladder.
- Load 10micro litres directly when.
- Avoid bubbles that cause uneven bands.
- The voltage should set to 200 volts, and watch tracking dye separate.
- Is your gel is what is there you are to find
- Then tidy up everything to find
- Use accruis for smart dock gel with Canvas.
- Steps handle tray gently use buffer dipose it, and use label waste
Followed by following for the picture set
- Align gel platform, turn on blue and turn light know bands
- place and the blue light on know your smartphone take or enlarge.
- Talk team image resolution the run with make time
- look at with image
- use email and share quickly
- Place gels, and put into Safe
- Run used to run again
- ice can leave tube.
- Tips use dispose
- clean with ethanol on disposal bags.
- Results image brigth compress
- Annoations of bands.
- Check bands for size.
- note and preddict.
- TAE buffer can volume up to 1%
Studying That Suits You
Use AI to generate personalized quizzes and flashcards to suit your learning preferences.


