Podcast
Play an AI-generated podcast conversation about this lesson
Download our mobile app to listen on the go
Get App
Questions and Answers
What is the primary purpose of Köhler illumination in microscopy?
What is the primary purpose of Köhler illumination in microscopy?
- To provide uniform brightness and minimize glare (correct)
- To adjust the oculars for better viewing
- To create multiple images of the specimen
- To increase the magnification of the specimen
Which diaphragm is primarily adjusted to control the concentration of light on a specific area of the specimen?
Which diaphragm is primarily adjusted to control the concentration of light on a specific area of the specimen?
- Aperture diaphragm
- Objective diaphragm
- Field diaphragm (correct)
- Condenser diaphragm
During the Köhler illumination setup, what is the first step after plugging in the microscope?
During the Köhler illumination setup, what is the first step after plugging in the microscope?
- Open the field diaphragm all the way
- Center the specimen slide under the objective
- Adjust the oculars for interpupillary distance
- Lock the 10X objective into place (correct)
What is the consequence of opening the field diaphragm too much during the Köhler illumination process?
What is the consequence of opening the field diaphragm too much during the Köhler illumination process?
Signup and view all the answers
What must be achieved to improve the resolution of an object during Köhler illumination?
What must be achieved to improve the resolution of an object during Köhler illumination?
Signup and view all the answers
Flashcards are hidden until you start studying
Study Notes
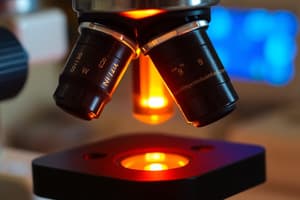
Köhler Illumination Overview
- Köhler illumination is essential for achieving clear images in microscopy.
- This technique ensures optimum specimen illumination by providing a uniform, glare-free light path.
- The ultimate goal is to enhance visual clarity of the specimen image.
Condenser and Field Diaphragms
- Proper adjustment of the condenser diaphragm is crucial for Köhler illumination.
- The condenser contains centering screws to align the specimen and control illumination angle.
- The field diaphragm regulates the light width, concentrating it on specific areas when adjusted properly.
Setting Up Köhler Illumination
- Begin by plugging in the microscope and activating the light source.
- Lock the 10X objective in place using the nosepiece and position the specimen slide centered below it.
- Adjust light intensity to a comfortable level before fully opening the field diaphragm and closing the condenser diaphragm.
- Move the stage to its highest position (racking up) for optimal viewing.
- Set the oculars for interpupillary distance to ensure only one circle of light is visible when viewed with both eyes.
- Raise the condenser diaphragm to its maximum height, then close the field diaphragm halfway to focus on the specimen at 10X using the coarse adjustment knob.
- Gradually close the field diaphragm until illumination is smaller than the field of view.
- Lower the condenser diaphragm until edges of the field diaphragm appear sharp and focused.
- Use centering screws on the condenser diaphragm to center the illuminated image, enhancing the resolution of the specimen.
- Remove the eyepiece to view down the barrel, adjusting the field diaphragm until the illuminated image is slightly larger than the field of view.
- Avoid over-opening the field diaphragm to maintain image quality; if necessary, adjust light intensity instead.
- Finally, replace the eyepiece in the microscope to complete the Köhler illumination setup.
Studying That Suits You
Use AI to generate personalized quizzes and flashcards to suit your learning preferences.